Sitting at a desk and bending your neck to look at your phone all day can really put a strain on one’s back. Eliminate the pain of a stiff back and improve your posture with these simple workouts!
Table of Contents
- Face Pulls
- YTWLs
- Foundation Pre-Founder
- Lower Back Training
- Anterior Pelvic Tilt Remedy
- Exercises to correct Hunchback Posture, Kyphosis and forward head carriage
Face Pulls
They’re great for building up the rear delts, traps, rhomboids and rotator cuff muscles, and are one of the very best exercises for treating and preventing an extremely common problem that a very large percentage of serious lifters face: internal rotation of the shoulder joint.
Otherwise known as “rounded shoulders” or “forward shoulder posture”, this problem typically results from an over-emphasis on pressing exercises for the chest and front delts in comparison to pulling exercises for the upper back and rear delts.
Even if you’re following what you think is a “balanced” weight training program, you’ll almost always end up providing a disproportionate amount of stimulation to your chest and front delts without even realizing it, even if it’s to a small degree.
In combination with other postural issues that many of us face these days (such as sitting at a computer all day with our head and shoulders hunched forward), this gradually causes the shoulders to roll forward and out of optimal positioning.
- Grab a rope attachment and set it at upper chest height.
- Rather than gripping the rope from the top with your palms facing down like most people do, instead, grip it from underneath with a neutral hammer-style grip.
- Although both versions will still be effective, this variation allows for a larger range of motion, is generally more comfortable, and most importantly, it allows for maximum external rotation of your shoulders as you pull the rope backward.
Keep your chest up, shoulders back and retract your shoulder blades. - Pull the rope back towards your face while at the same time imagining that you’re trying to pull the rope apart. Think of it as though you were hitting a back double bicep pose on each rep, while making sure to keep your head stationary.
- Pause momentarily in the fully contracted position and focus on squeezing your rear delts and upper back before returning to the starting position.
The key to proper face pull form is control.
If you simply load up a bunch of weight here and start explosively yanking the rope back using poor technique and a lot of momentum, not only are you going to greatly decrease the effectiveness of the exercise by involving your lower back, but you could very easily hurt your shoulders in the process as well.
Keep the weights moderate and aim for 3-4 sets of 8-12 smooth, deliberate reps, with all of your focus on contracting your rear delts and upper back as intensely as you can.
Face pulls can be performed 2-3 times per week and work well when added executed as part of a back workout or shoulder workout.
Source for above.
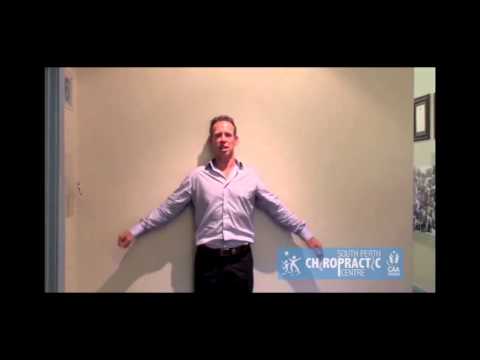
Before performing Face Pulls, be sure to stretch your chest muscles first.
The classic “corner stretch” where you face the inside of a corner with your arms out to the sides, elbows bent 90 degrees so your forearms point straight up and your elbows are out to your sides, with the two sides of the corner pushing your elbows back as you lean your torso in towards the corner.
What I had to tweak to make sure my pecs were getting stretched instead of my shoulders was raising my elbows a little bit higher, so they were slightly above my shoulders. Also, being deliberate with the stretch – you can sorta “collapse” your torso into the corner, but that’s not gonna do you any good. Maintain some level of good posture and put some effort into making sure the stretch is targeting where it needs to. I (maybe like others) have a tendency to relax a little much during stretches so that it basically falls to the least difficult position, but that doesn’t often stretch the muscles that need it, so you gotta be a little more engaged.
YTWLs
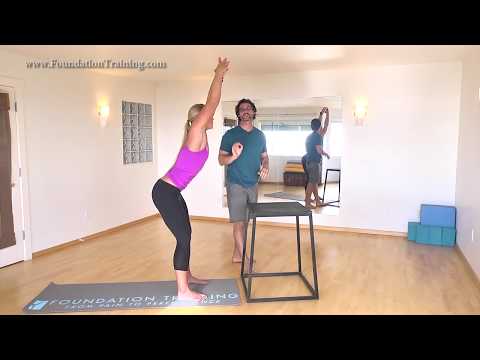
Foundation Pre-Founder
Lower Back Training
DISCLAIMER: This is an advanced workout with minimal instruction. DO NOT attempt this workout if you’re a Foundation Training beginner and especially not if this is your first attempt at Foundation exercises. If done incorrectly, these exercises could potentially exacerbate your back pain, especially if you have a pre-existing condition, or injury.
Anterior Pelvic Tilt Remedy
Advanced Psoas & Hip flexor stretch

Quad Stretch
Be careful with this one if you have knee pain since it can aggravate it. To make the stretch harder, pull your hip upward as you do the stretch.
Anterior Pelvic Tilt Buster: The Brettzel Stretch

Hip Strengthening
Glute Bridges
Probably one of the most useful exercises ever, but all too often the benefit is cut down by poor form. The glute bridge is a great butt builder and will teach you how to activate the hip. The main thing to watch for is using your lower back and/or hamstrings instead of your glutes. Most people have dormant glutes so activating them will take work. Here’s a useful progression to get started:
- Lay on the floor with your knees bent and feet flat on the ground. From there practice just flexing and releasing the glutes (yes). You should feel the glutes and make sure they are flexing, while at the same time your lower back/hamstrings should be relaxed.
- For the second progression you’re going to do the same thing but now focus on levitating your butt an inch off the ground. Basically, keep flexing those glutes until your hip pops up.
- Keep repeating 1 and 2 until you can isolate the glutes really well and can bring them up pretty high.

Planks for less back pain
Planks are both the best and worst exercise. They are the best exercise because they target so many muscles in your body from your abs, obliques, to your glutes and hamstrings – to name a few. They are the worst exercise because almost everyone chooses a progression that’s way too difficult, does poor form and holds for way too long.
When you plank, your body is supposed to be straight, in a neutral position. Elbows under your shoulders, head looking down, back elongated and straight, hips not sagging or up in the air. Legs and knees straight. If someone lay a PVC pipe down your back, they should be able to make contact with your head, upper back and hips all at the same time.
Before you go ahead and start planking, I recommend starting with the half-plank. It’s a lot easier to start, get the form straight and then increase difficulty and slowly build up to the full plank and all it’s wonderful/tortuous variations.
Half Plank

Full Plank

Walking
Walking is our most basic movement pattern and one that we evolved doing with great frequency. As such, our body is adapted and dependent upon walking to perform optimally. Beyond making you feel better, walking will strengthen your abdominals, obliques, hamstrings, glutes while at the same time stretching the quad, hip flexor and gently lengthen the lower back if you walk with an upright posture.
Walking isn’t a magical cure for anterior pelvic tilt but seeing how this condition mainly is a result of being sedentary, it would be obvious that the main cure is reducing sedentariness. Breaking up sedentary times with brief periods of movement is a great way to lessen the impact all that sitting has on your body, without losing productivity.
Anti-Anterior Pelvic Tilt Posture
- Chest up like a rooster
- Shoulders back
- Arms by your side, palms facing forward
- Back tall and straight
- Feet shoulder width apart
- Weight distributed on the arches of your feet
How do we get the hip to unstick itself?
- Flex your glutes, we practiced that a lot already!
- Flex your abs and pull your stomach in. Imaging your abs connected to your hip and your hip pulling upward as you flex and suck them in.
- Flex your glutes and hamstrings some more: you should feel your thighs slightly turn outwards and your pelvis coming a bit more forward.
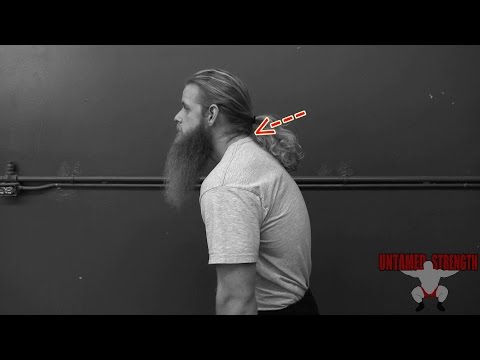
Exercises to correct Hunchback Posture, Kyphosis and forward head carriage