In the words of our beloved Lord Stark of Winterfell, “Winter is coming.”
Since moving from sunny California to Tennessee, we’ve had to adapt to the colder weather with some winter prep for our tiny house. This is critical if you live in an area where it regularly gets to below freezing temperatures. Here’s what we did:
- We removed the sun screen shades that we installed during summer time to help block excess sunlight from penetrating the windows. You can see the Sun Screen Shades in our Ways to Stay Cool post.
- We removed our window A/C Unit and are now storing it in our second loft.
- We winterized our outdoor water hose.
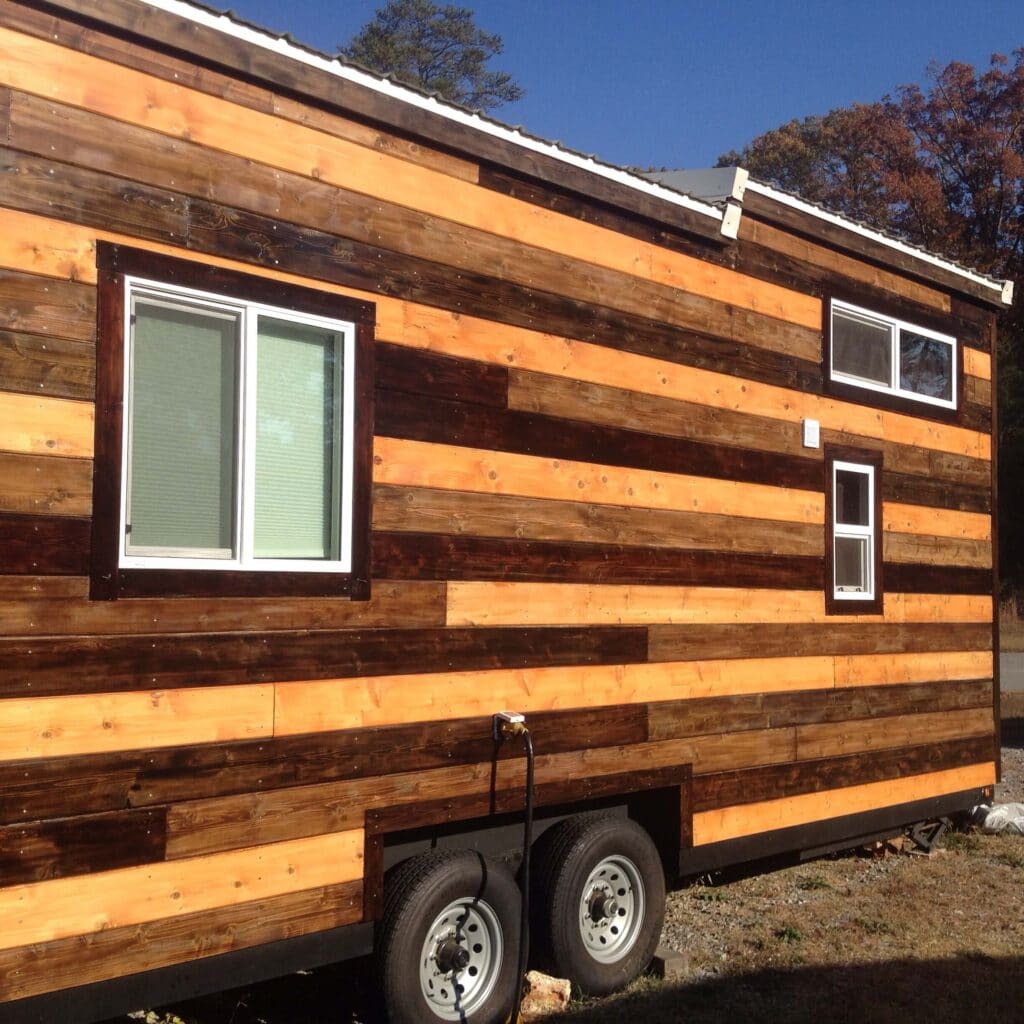
- We added another coat of stain and spar urethane sealant to the exterior cedar. We have three colors on our cedar: Minwax Special Walnut, Minwax Red Mahogany, and Minwax Golden Pecan.
- We built a stand for our secondary Envi heater out of PVC pipe! We decided to purchase a second Envi heater since the one probably won’t be substantial enough during winter freezing temperatures.
- We added DIY skirting to the outside of our tiny home.
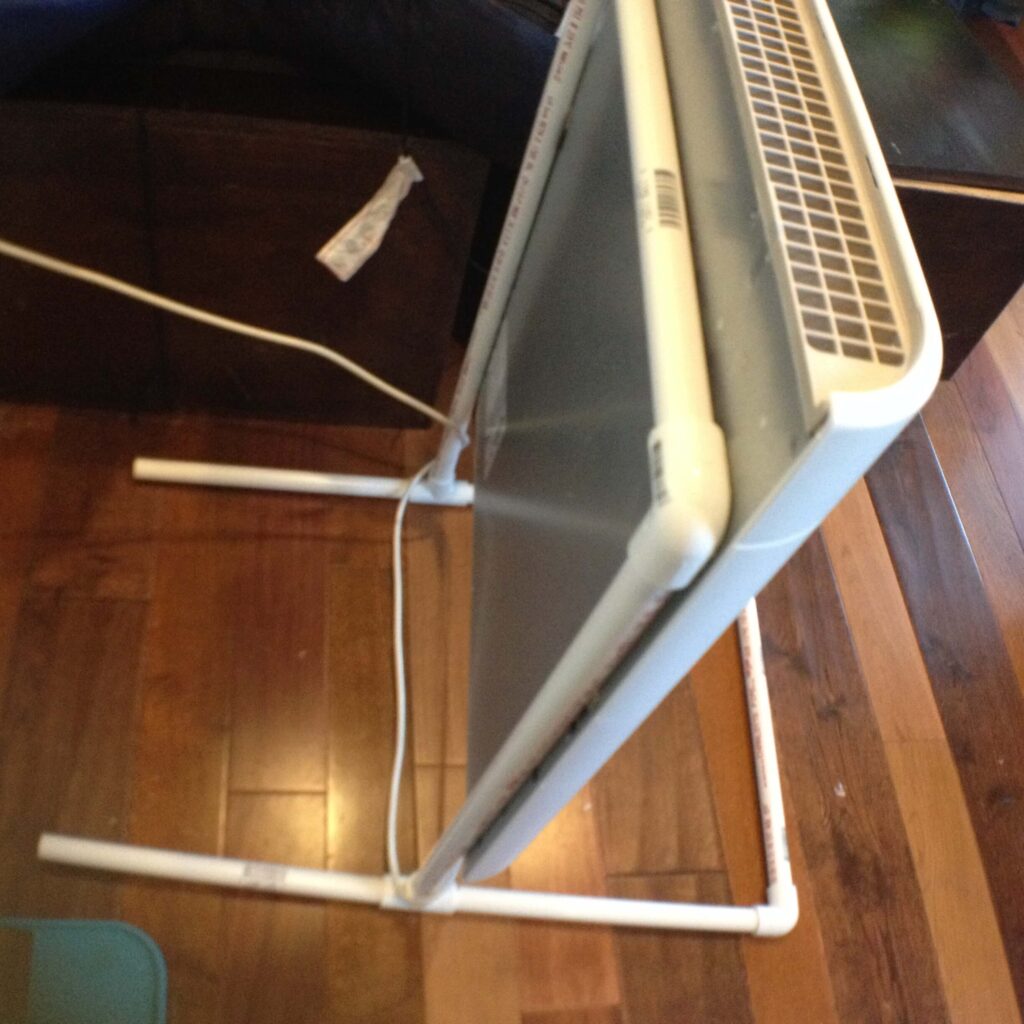
Envi heater on DIY PVC pipe stand


Let’s go more in depth into how we winterized the water hose and made skirting for around our home.
Winterizing Your Water Hose
Turns out, it’s pretty simple to winterize your water hose so it does not freeze during winter. The heat tape is the most expensive item, but it’s well worth it you would rather not have frozen water in your lines!

How to Winterize Your Water Hose
Step 1: Wrap your hose in aluminum foil. Some places on the internet use some other material to wrap the hose, but we opted for the aluminum foil because it is both cheap and effective.
Step 2: Wrap heat tape around the hose.
Step 3: Put pipe insulation around the heat tape and the hose. We recommend you use pipe insulation that is about an inch larger than the hose and the heat tape, that way the insulation will fully wrap around the hose and heat tape.
We used duct tape to ensure the insulation stayed around the hose and heat tape.
Heat Tape comes in varying sizes, much like potable water hoses. We originally had a 50 ft potable water hose because we needed one that long where we were in California. About two months ago, in preparation for winter, we ordered something much smaller at only 15 ft., the Teknor Apex (7503-15) 1/2″ x 15′ Starter Water Line Hose. It works great and we don’t have much excess like we used to with the 50 ft. potable hose.
All that to be said, we purchased the smaller potable water hose in order to purchase the smaller length of heat tape, which came in at 18 ft. We went with the Frost King Automatic Electric Heat Cable. So far, so good! We’ve had some nights below freezing already and has worked great.
Tiny House DIY Skirting
DIY Skirting on the bottom of a tiny house (or RV or even a mobile home) can help prevent the wind from blowing under, thus keeping the house warmer. We came across several options for skirting, but most of them would have cost $250 or more and we are on a budget. For about $120 we were able to make really effective DIY skirting for our tiny house!
We wanted to make sure that the DIY Skirting looked as professional as possible and still be effective in case of wind.

We purchased five 4ft x 8ft “Poly” 3/4 inch rigid foam insulation boards. Each of the boards costed around $12 each from the local Home Depot. We also purchased a roll of heavy duty & all weather duct tape in black to match the black trailer foundation our tiny house is built on. Lastly, we bought a gallon of Valspar heavy duty exterior grade black paint (but we definitely didn’t need that much).
We’re hoping through December, January, February and March that we’ll be able to recoup the cost for the DIY skirting with the savings we should have from not having to have the heat on as high.
Thanks for coming along on our winter prep. journey!
Affiliate Disclosure: Some links in this article are affiliate links. We may earn a small commission if you make a purchase through these links, at no extra cost to you.


