Everything you need to know to install and setup a Synology NVMe Volume using DSM 7.2. Learn how to install dual NVMe m.2 SSDs along with some helpful tips and tricks for your own NAS.
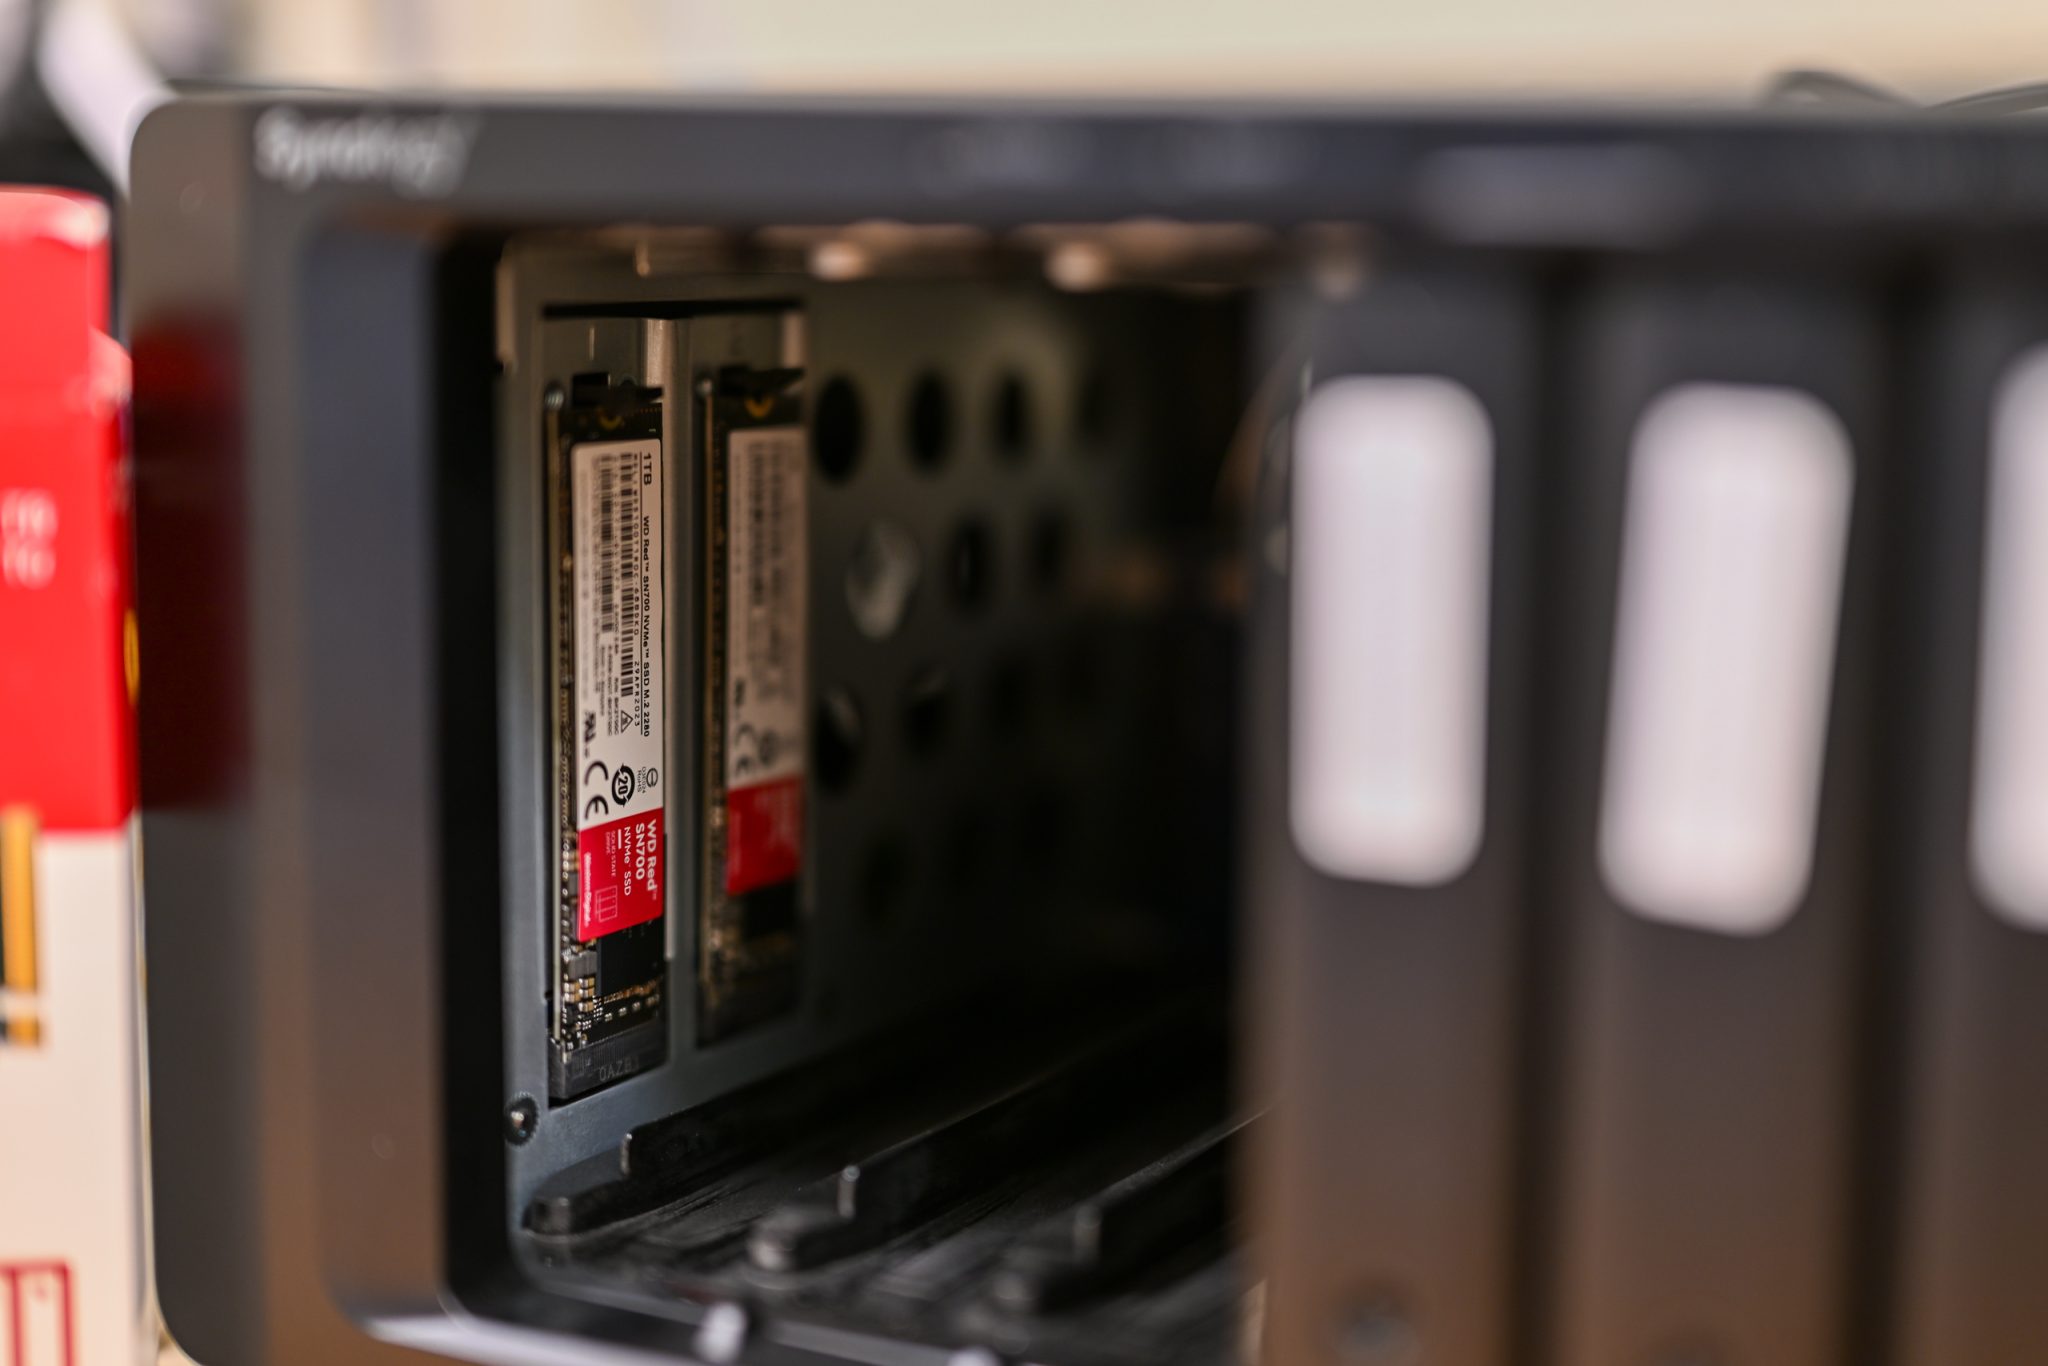
Using DSM 7.2.x and full volume encryption on a DS1821+.
This is meant to be a thorough and complete walkthrough, which takes you through every step of the way to install and setup a Synology NVMe Volume. No stone should be left unturned as you follow along with your own NAS. Did I miss something? Write a comment at the bottom or send me an email.
Table of Contents
Buying the NVMe M.2 SSD
If you choose to buy official Synology supported NVMe drives, you’ll be able to skip a large portion of steps in creating the volume. This will cost you about 2-3x markup in price. If you are comfortable running a shell script to use the drives unofficially, you can save several hundred dollars. If you’d rather stay on the official support channels, go ahead and stick with the Synology SSDs and you can skip ahead on some of these steps.
Buying Options:
- Synology M.2 2280 NVMe SSD SNV3410 800GB (1,022 TBW, 0.7 DWPD)
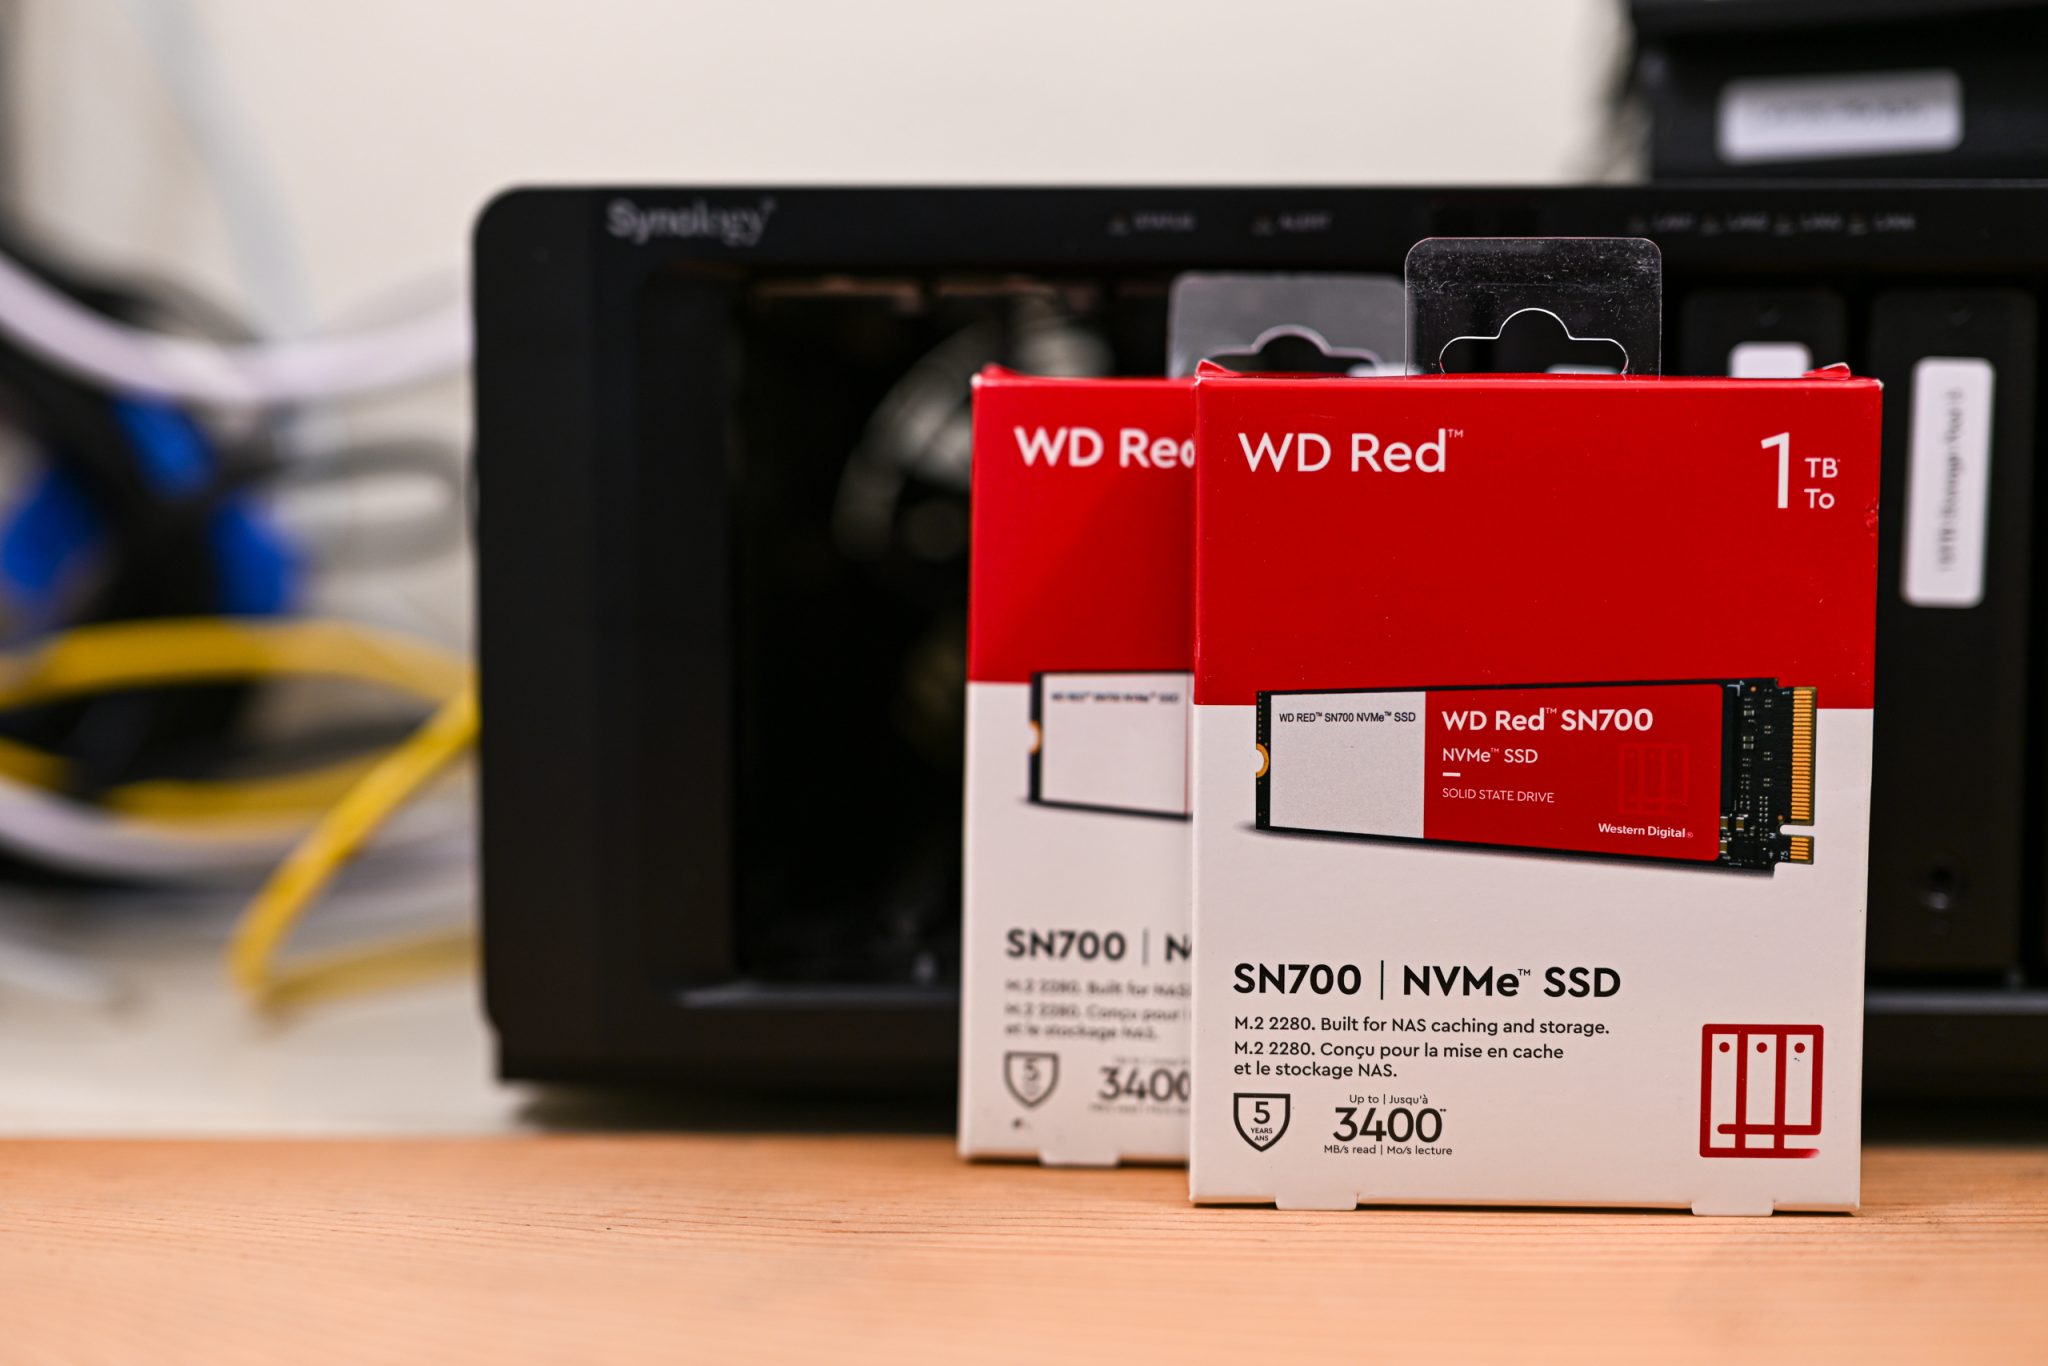
- Western Digital 1TB WD Red SN700 NVMe WDS100T1R0C (2,000 TBW, 1 DWPD)
- Tons more, pay attention to TBW and DWPD numbers.
I’m currently using 2x 1TB WD Red SN700 NVMes.
TBW and DWPD
TBW is an endurance rating, or terabytes written. This is the total amount of terabytes the drive can write in its lifetime. The second number you’ll want to consider is Drive Writes Per Day (DWPD), which is how much data can be written to the drive every day for its warranty period.
Essentially, you want to make sure the DWPD and TBW are high enough in a NAS environment with data being written on a regular basis that you won’t run the drive into the ground too soon. A lot of consumer/cheaper SSDs have a TBW of under 400 and that really is too low.
The formulas:
DWPD to TBW: TBW = Capacity(TB) * DWPD * 365 * Warranty(Years)TBW to DWPD: DWPD = TBW / (365 * Warranty(Years) * Capacity(TB) )An example using the 1TB SN700’s:
TBW(1TB) = 1TB * 1 DWPD * 365 Days/Year * 5 Years = 1,825 TBWIt doesn’t quite meet the spec sheet WD lists, but it is still higher than a lot of the alternatives.
Form Factor: M.2 2280
When buying a NVMe M.2 SSD, you’re going to first make sure the size is 2280 form factor. Anything else will not fit.
You’ll also want to make sure you’re buying a NVMe without a heat sink, or you’ll have a hard time getting everything to fit in. Some configurations might allow a heat sink if the slots are next to an empty drive slot, but I’d plan on it not working.
Drive Capacity
Evaluate the size you think you need for use in your Synology NVMe Volume, then make sure it is either Gen3 or Gen4. I went for 1TB because of the price point at the time of purchase. I bought 2 to run in SH1 and do full volume encryption. Plan to leave between 20-30% of the drive empty to allow for wear leveling and keeping the life of the drive at an optimal amount.
So with my 1TB drive, I know I can only use 750-800GB of data to help with wear leveling. I bought 2 to run in SHR1. I’m running docker apps, photo organization software, and home automation, so I don’t want that to fail if one drive goes out.
A lot of people will use under 300GB of data and are probably safe with 512GB drives, but I like to be extra and plan for more.
If you’re choosing between Gen 3 and Gen 4, I’d shop based on price point and whatever is cheapest. Your Synology will not be taking advantage of Gen 4 features for a few years as of writing this, 2023.
Buy from reputable manufacturers only.
Drive Installation
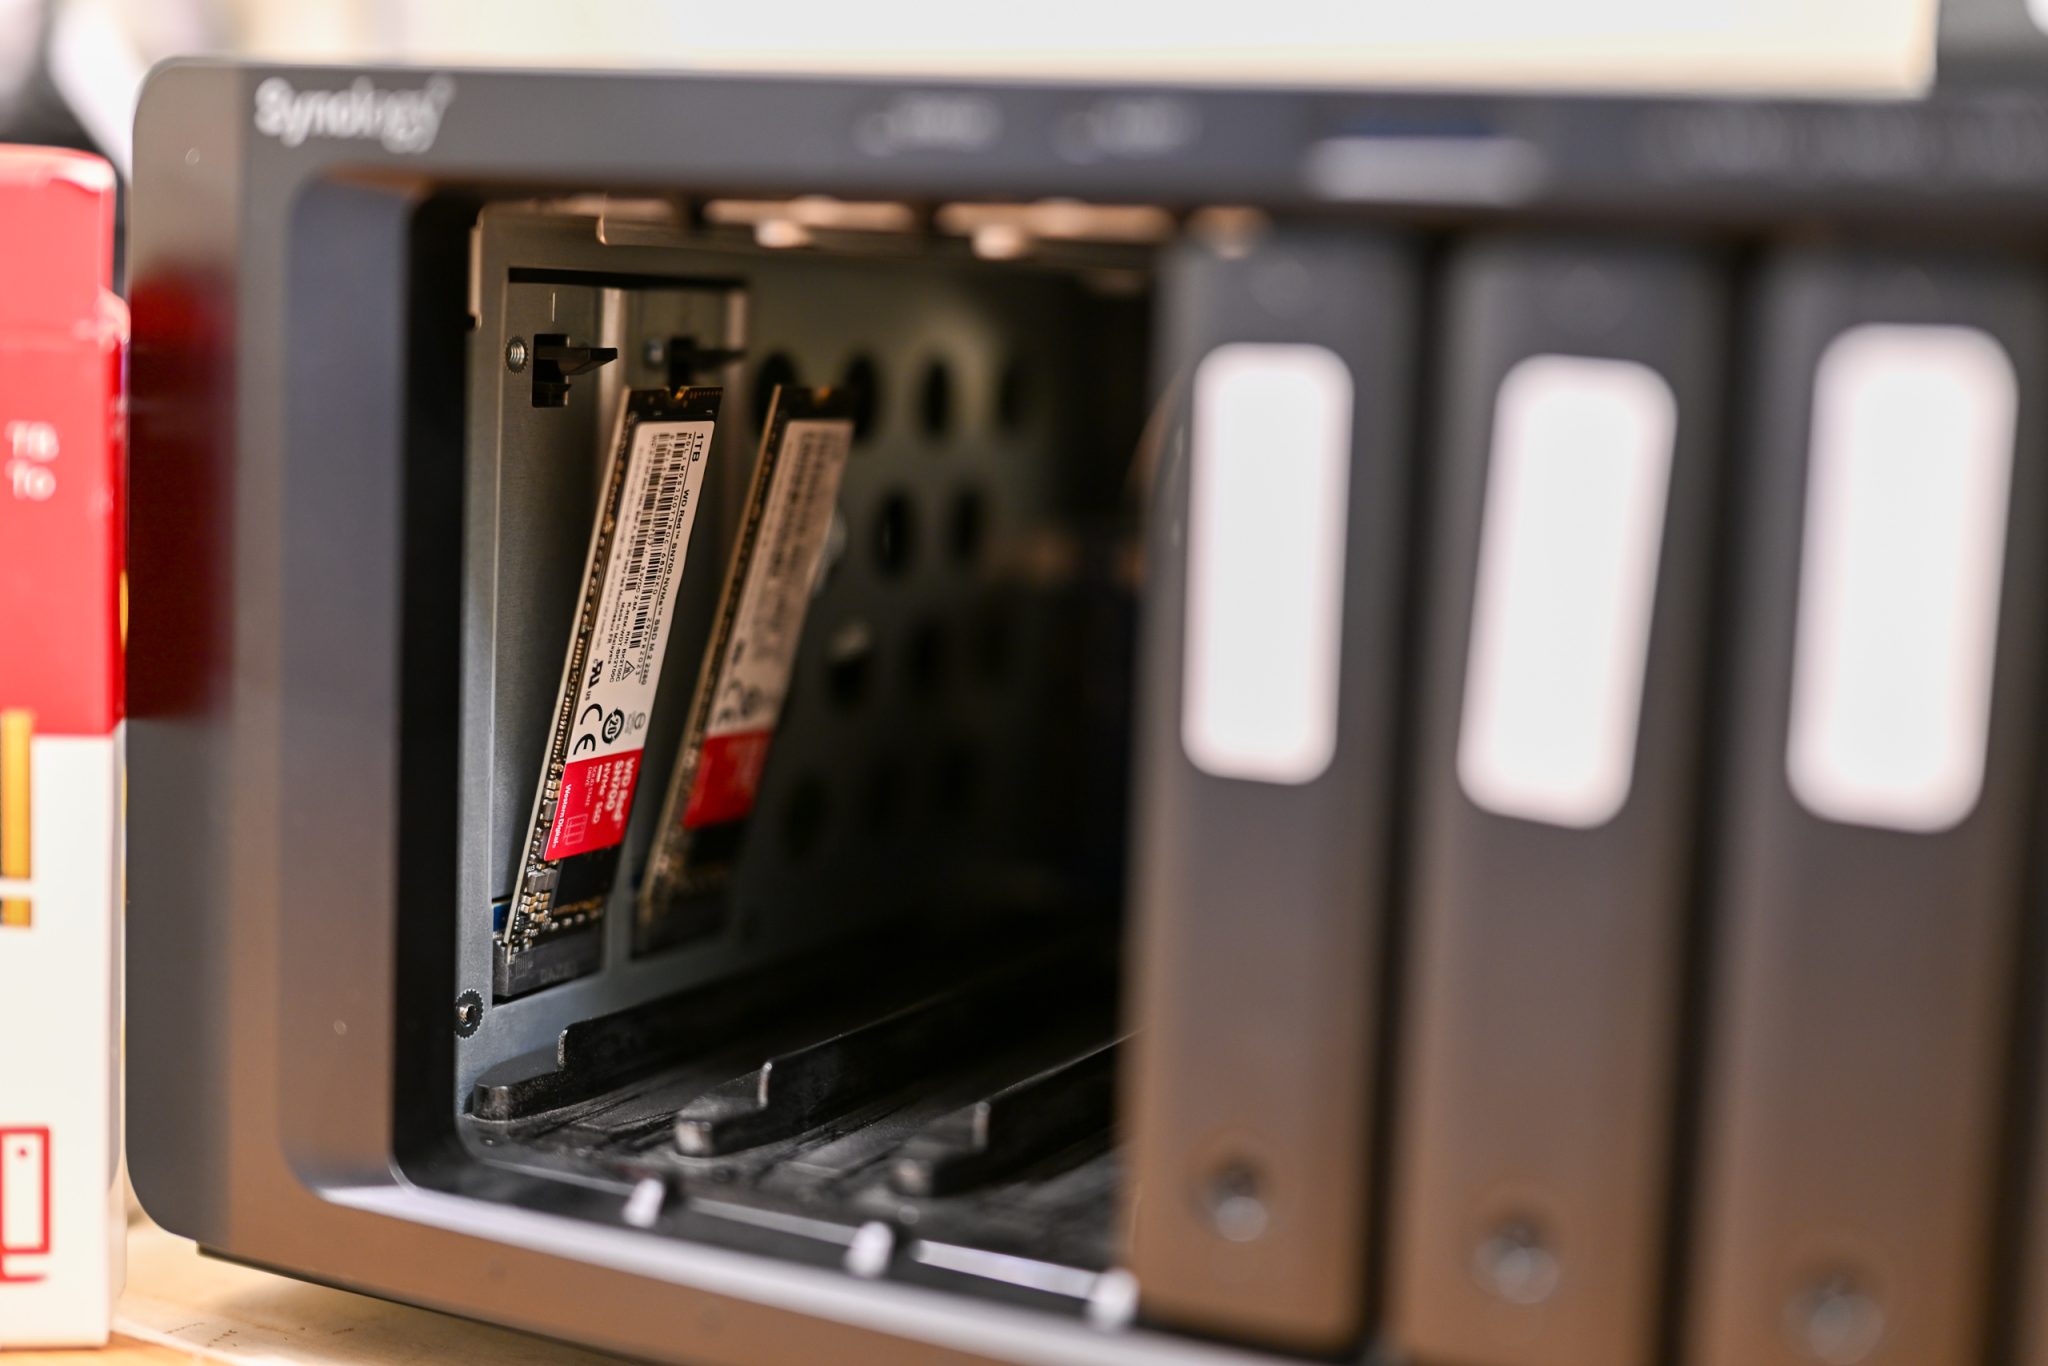
Shut down your Synology. Remove hard drives from their slots. Install sticks of ram. Be careful to only touch the edges and not the surface points or circuitry. Reinstall drives and lock them in place. Reconnect your Synology and turn on.
They get inserted at a slight angle, then push on the top to straighten them until you hear a small click. Stick your drives back in if you had to remove them to get to the M.2 slots, then boot ‘er up!
Unsupported Drives
The first thing that happens when I boot up the Synology NAS is a notification saying 2 new drives were detected in the notification panel with an offer to set it up.
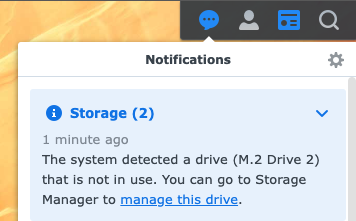
Clicking manage this drive will bring me to the list of drives, where my 2 new SN700’s show up in the HD/SSD tab of the Storage Manager.

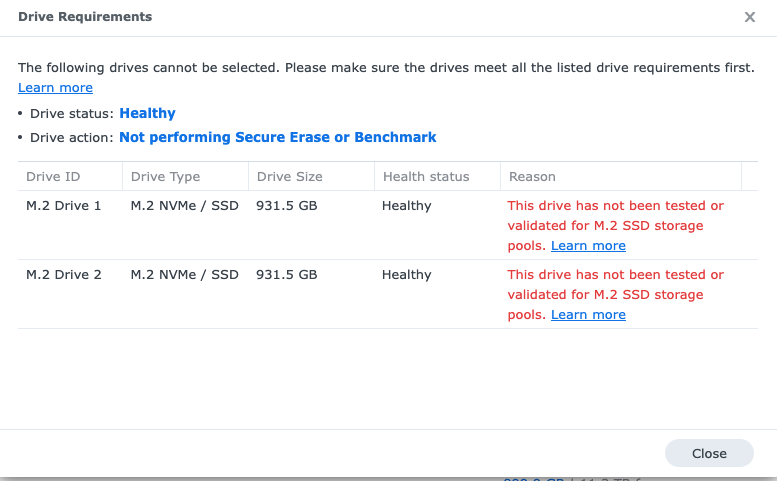
However, when I go to create my Storage Pool, I am warned the drives are not supported and I cannot use them.
Guide to SSH: https://kb.synology.com/en-id/DSM/tutorial/How_to_login_to_DSM_with_root_permission_via_SSH_Telnet
Security note: My personality security is to keep SSH disabled when not actively using it, and only enable for short periods while running these commands. As soon as I’m done, I disable SSH access.
The best way around this is to use this user maintained script.
007revad Synology M2 volume Script
Instructions: https://github.com/007revad/Synology_M2_volume
- Download the latest version here.
- Move the unzipped script to a location on your Synology. Doesn’t really matter where, utilize your own organization and preference. I have a folder made for things like this.
- Connect via ssh for the script to work.
- Run the script. My location and script looks like this:
sudo -i /volume1/Entertainment/Apps/Synology_M2_volume/syno_create_m2_volume.sh
You’ll need to figure out which volume you put the script on and get the location right. The above is simply where mine is.

Note: Blacked out server name as a security precaution. You’ll see yours.
Type yes if you’re ready. Or try a dry run to double-check. I’m skipping the dry run this time cause I did this several times already to write this article.
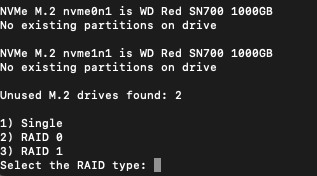
I’m doing RAID 1, which is essentially SHR1. I typed in 3.
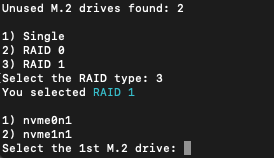
Type 1. You’ll be asked to select the second M.2 drive, but only one will be listed. You might be tempted to hit 2, which I do every time, but the answer is 1 again, because the first drive was already selected and removed from options.
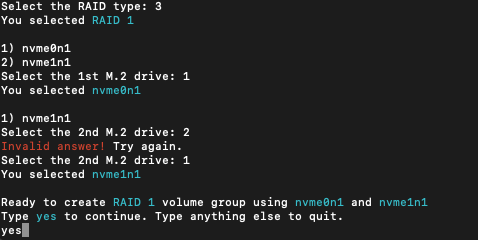
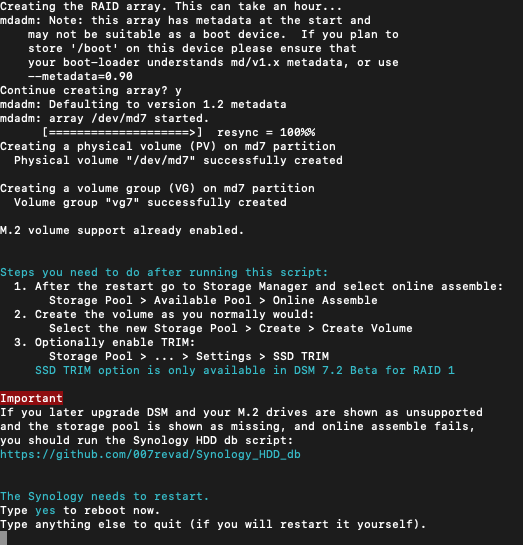
After typing yes you’ll get one final warning, with all the drive info confirmed from your previous choices.

Type y and hit enter. You’ll get another last warning, you won’t be able to boot from the volume. Type y again and hit enter.

And now it will run! Started at 6:56pm. Finished at 7:24pm. The script warned it might take up to an hour, but this was way shorter. From here, type yes to restart the Synology.
New Storage Pool and Volume
This section is what will appear the first time you are creating a Synology NVMe Volume and Storage Pool from the M.2 slots. I originally did this with my first NVMe drives, then decided I wanted to go with a higher TBW/DWPD rating and replaced them, which you can see the steps for in Replacing Storage Pool and Volume.
When your Synology has finished booting up, you will see this message in notifications:
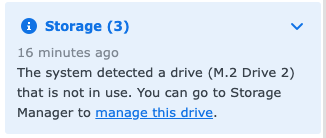
Click on Manage this drive.
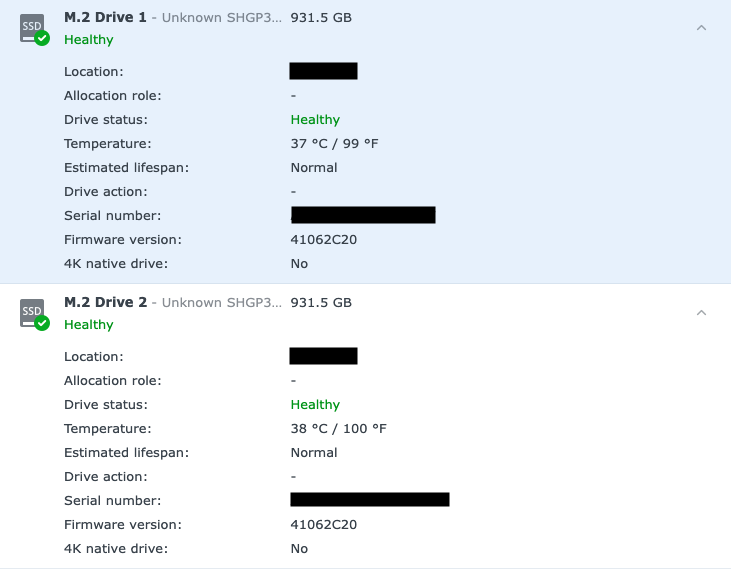
I haven’t run the script to set these drives as unsupported yet, but they still show up as installed and working. If you don’t know what this means, we’ll get there in a moment.
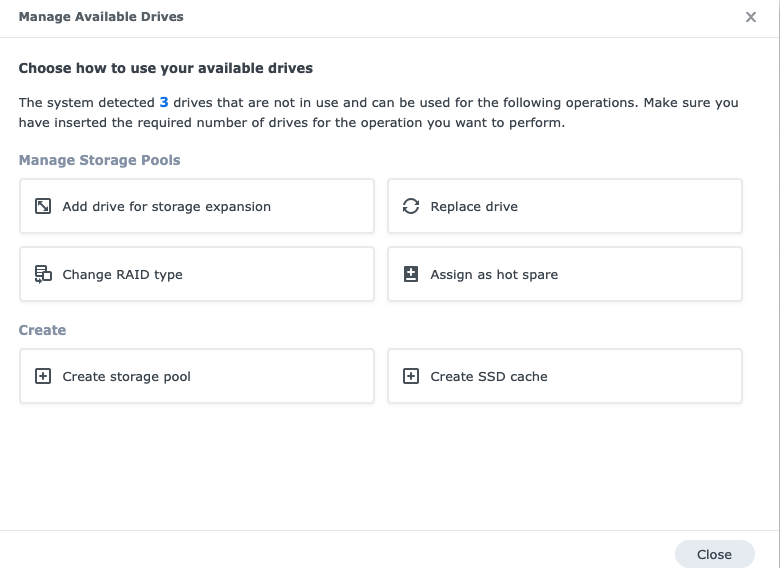
I installed a regular hard drive at the same time of shutting my Synology down, which is why my screenshot shows 3, and not 2 drives not in use.
Click on Create Storage Pool:
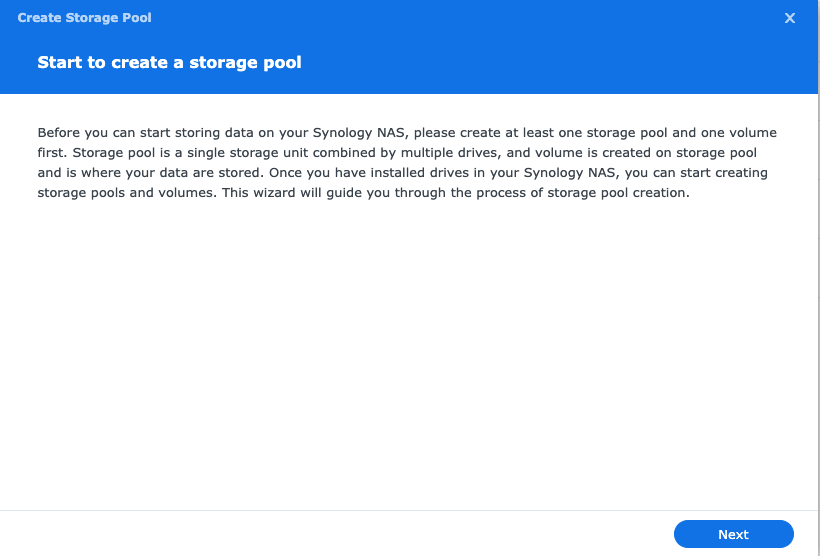
Click Next:
Select RAID type, SHR, and type in Description. I used Docker, cause that will be what is going on the drive. All the Docker containers!
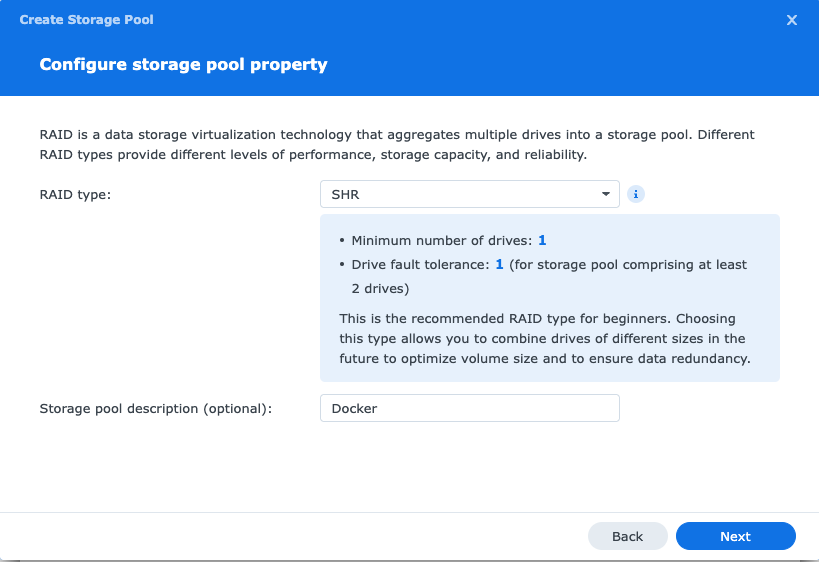
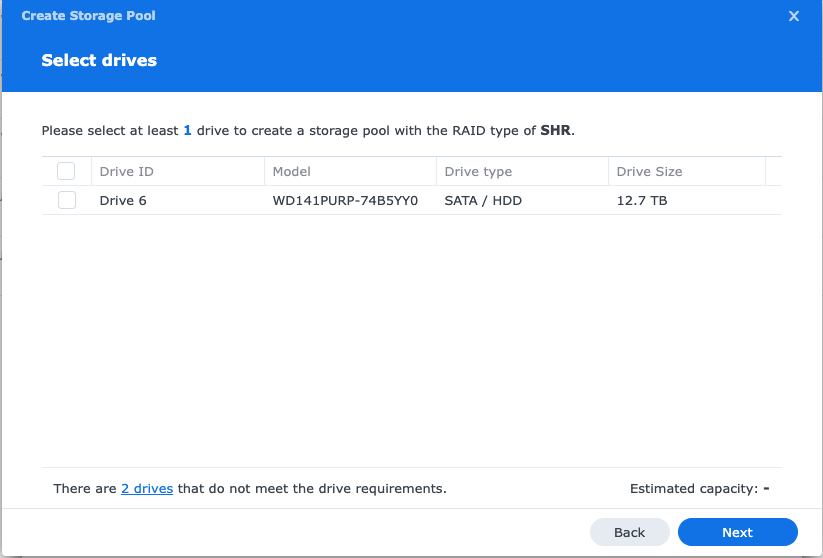
Warning: If you go to Select Drives from here, you will notice I have a message that says 2 drives do not meet requirements. This will not show up if you are using Synology NVMe’s. If you’re using “unsupported” drives, follow the next steps. If you’re using Synology, skip ahead to the next Storage Pool creation section.
Storage Pool and Volume Setup
This section is what I experienced after removing the hard drives above and put in new ones.
Log back into your account and you’ll be presented with some new notifications.
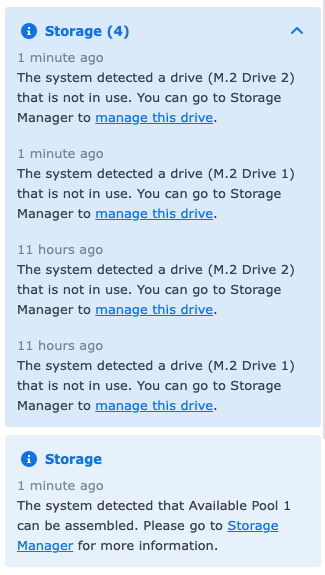
Click on Storage Manager and you will see an Available Pool.

If you click Remove, you’ll have to restart the script process. Click Online Assemble and give it a few minutes.
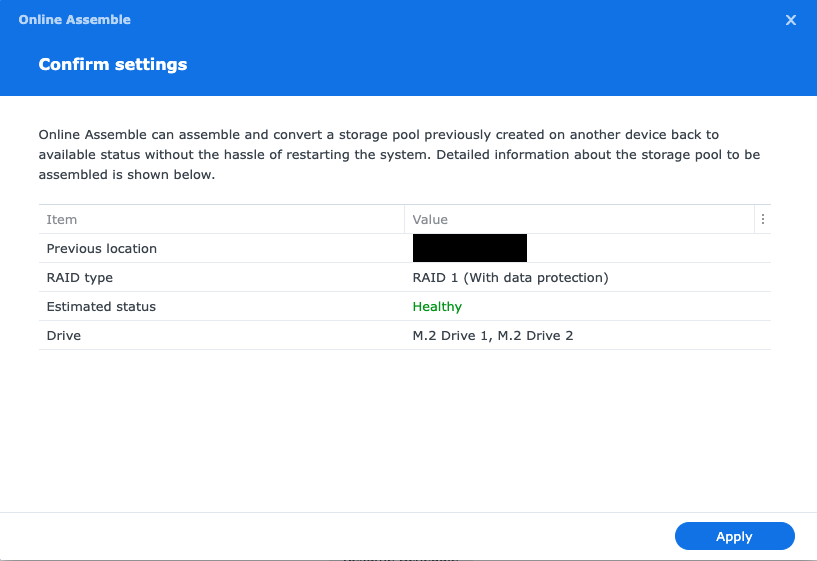
After clicking apply:

Once Assembly is completed, you can Create a Volume and set that up:
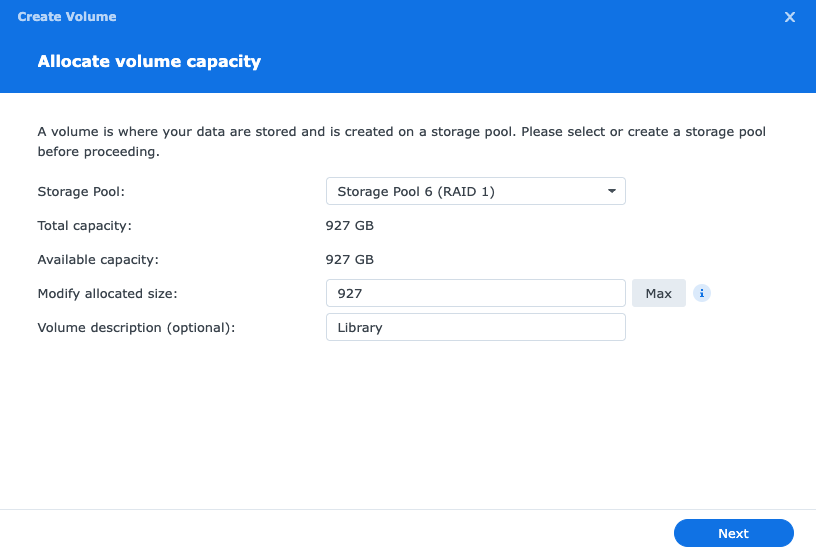
I named mine Library, cause, well, you know. But name yours whatever works for you. I would suggest not using Home as it might conflict with other Synology functions around users.
Synology has a list of default names you might consult for descriptions to avoid.
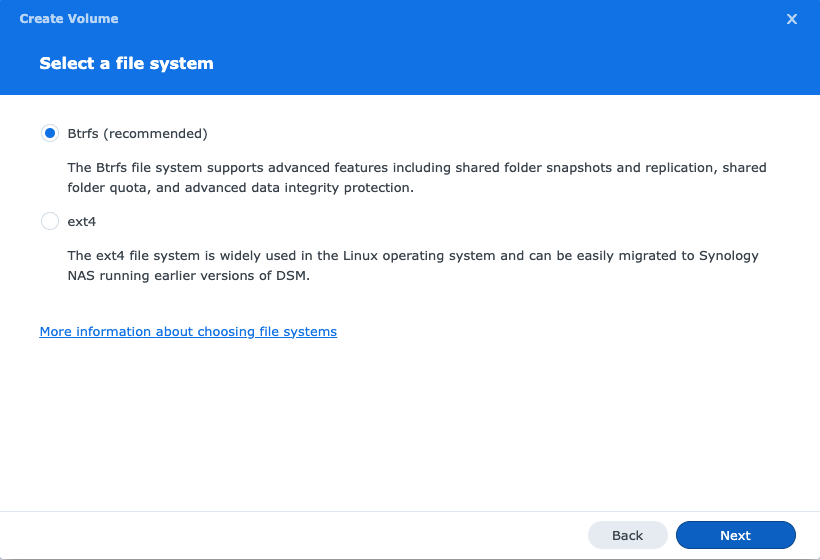
Select Btrfs unless you have some very specific need to use ext4.
Full Volume Encryption
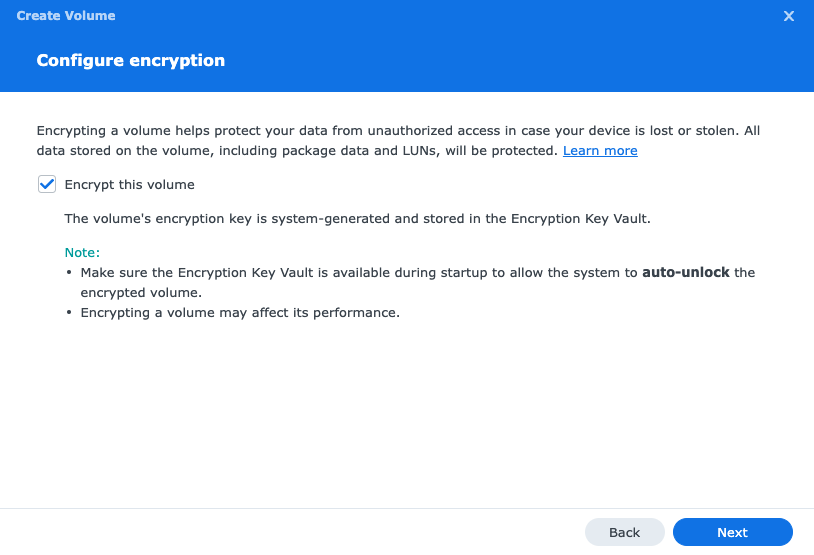
Since DSM 7.2, Synology has reported that Volume Encryption performs significantly faster than Shared Folder encryption. I’ll be slowly switching all my volumes to full volume encryption anyways, so might as well do this one too with a fresh start.
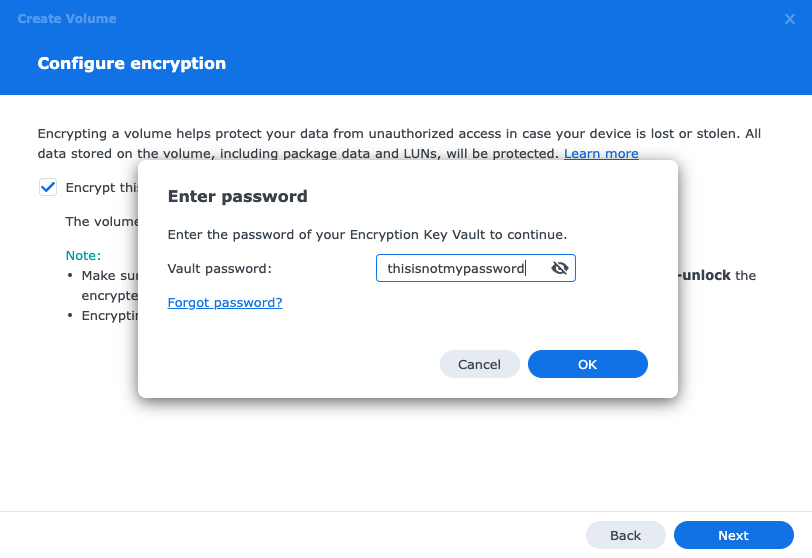
Enter a password. This is an existing Encryption Key Vault password if you already have an Encrypted Volume, otherwise create a new password and keep it safe. I use Bitwarden with 2FA to manage and keep track of all this stuff.
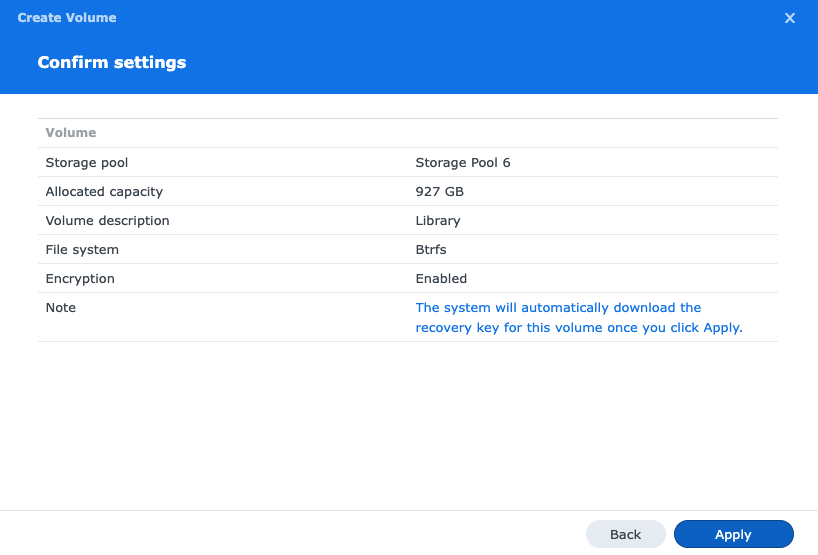
Hit Apply and the key will download to your computer. Keep it safe in whatever your preferred method is. This is what unlocks the volume.
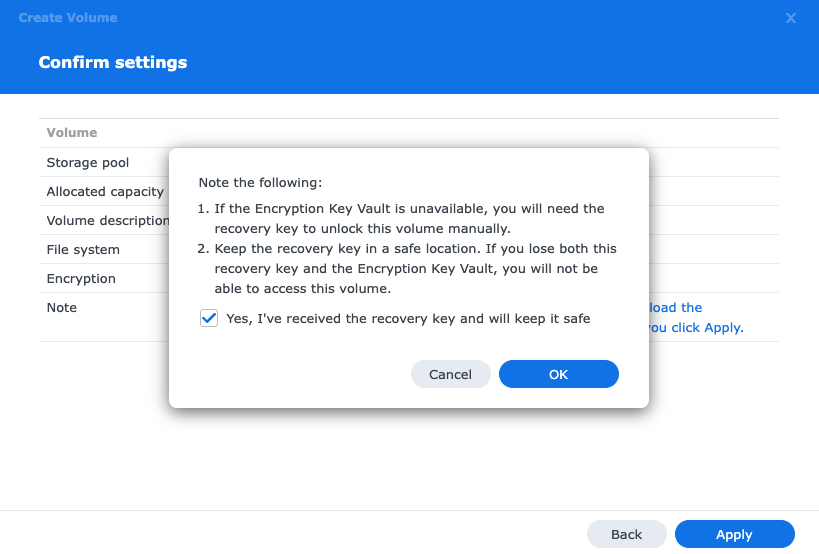
Hit the checkbox and hit ok. Now your Volume will begin the creation process.

The creation process will take about 5 minutes or less.

Final step on the Storage Pool! Click on the three dots … and hit Settings.
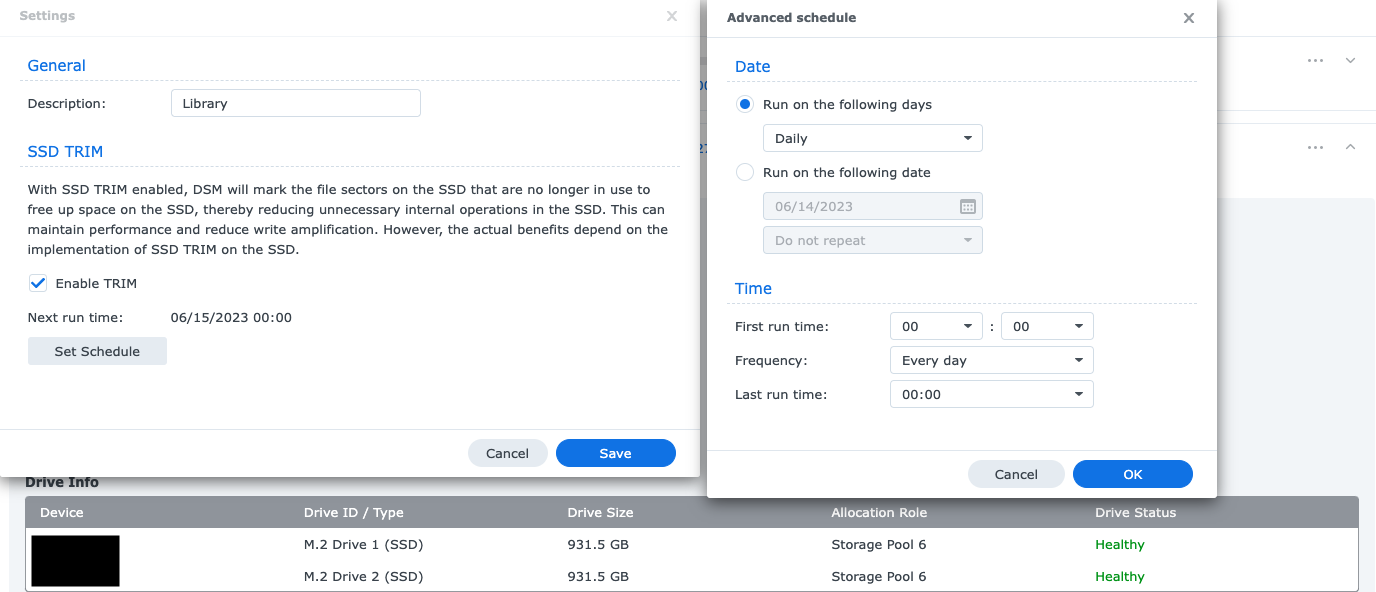
Select the checkbox for Enable TRIM. Set schedule will automatically be set for Daily, which is completely fine in most instances. Enabling TRIM is a vital step for the longevity of your drives.
Create a Shared Folder
Now that the Storage Pool and Volumes are created, its time to setup the Shared Folder on the drive. The nice thing about Full Volume encryption is the Shared Folder doesn’t need to be encrypted.
Head over to your Control Panel and click on the Shared Folder icon.
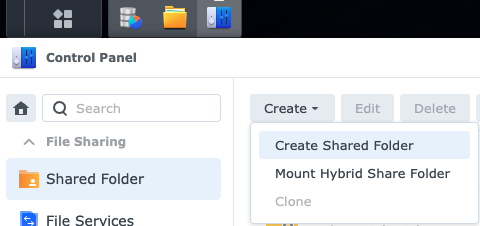
Select Create Shared Folder from the Create dropdown.
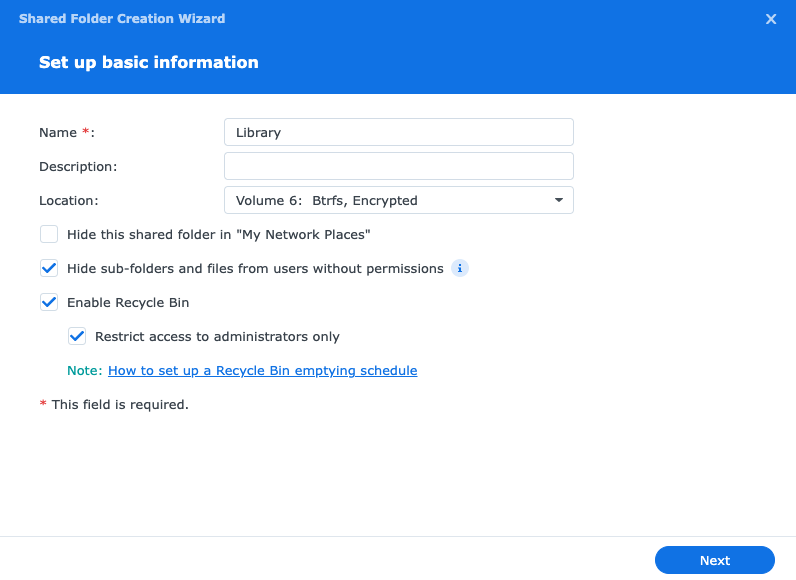
I wanted the name to match my Volume name for ease of my own organization. I always select Hide sub-folders so only those who need to know can view everything on this Folder. Location is selected to the Synology NVMe Volume – which you can see is listed as Encrypted.
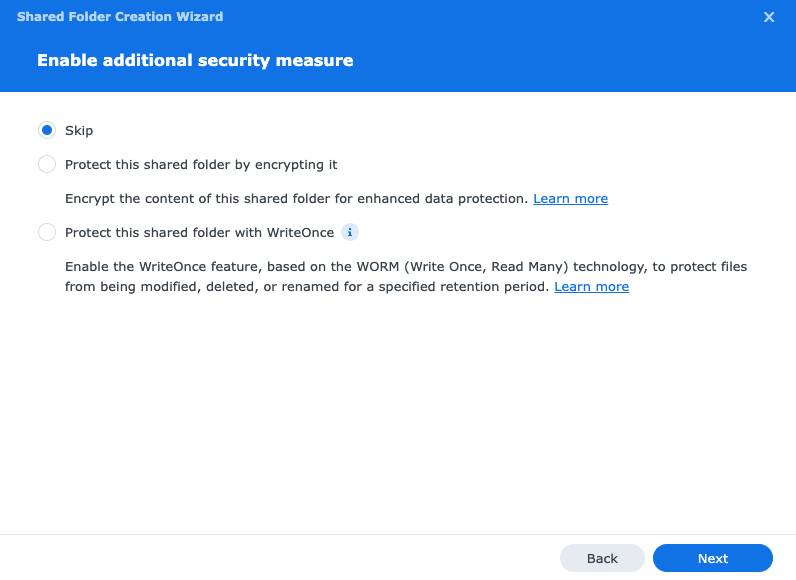
Skip Encrypting the shared folder. You already have Volume Encryption. If you didn’t encrypt the Volume, then you may want to encrypt the shared folder here.
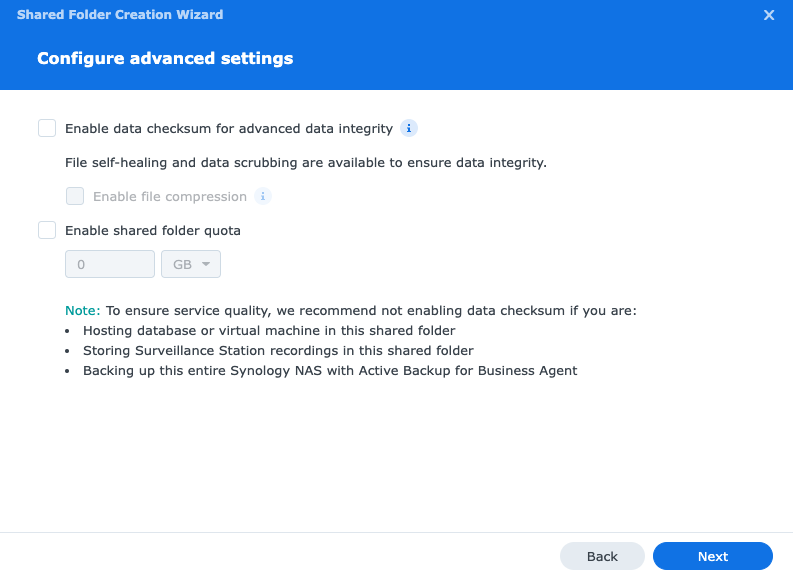
If you plan on using the Synology NVMe Volume for storing files and not just running apps, you might want to check Enable data checksum. The purpose of the volume for me is to run Docker and other apps that are constantly moving and reading/writing, so I will not be checking this.
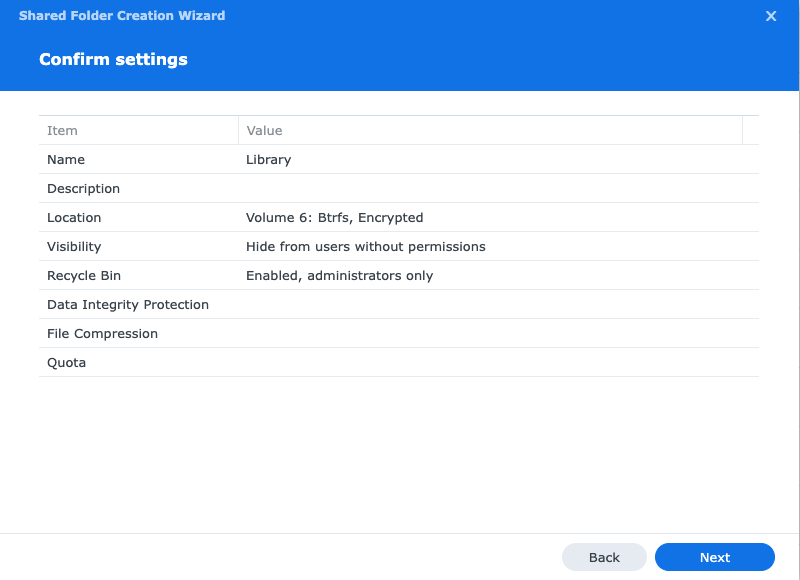
Give your settings a once over to confirm and hit Next.
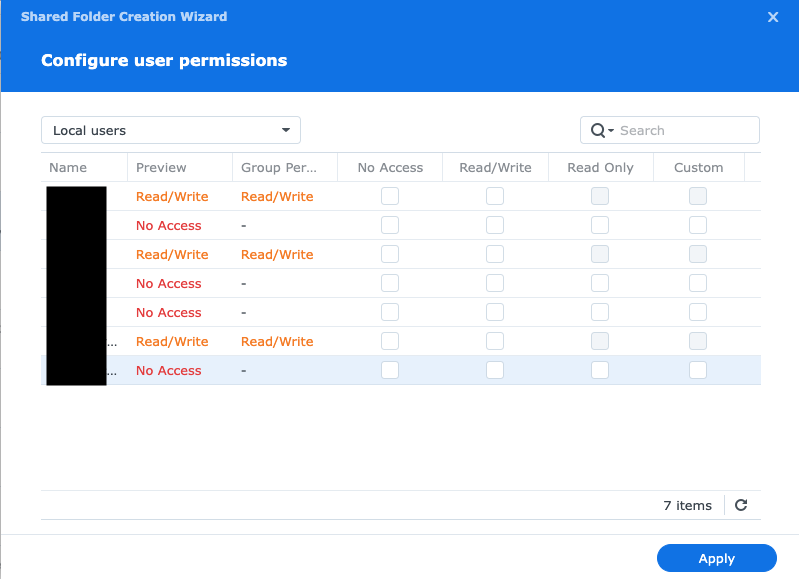
If you need to manage custom permissions, this is the screen to do so. I left them all as is for now. This can always be adjusted later as needed.
As soon as you hit Apply you’ll be taken back to the list of all your Shared Folders. I headed over to my Finder on OSX and looked for the shared folder on my networked drive to confirm.

Alright! It’s ready for use!
Updates:
June 13 2023: Switched brand of M.2 NVME used and updated screenshots and information along with it. Added info about DWPD. Added a few more details and tips.
- About the Author
- Latest Posts
I strive to paint vivid landscapes with my words, bringing the magic of far-off lands and enchanting aromas to life for my readers. Combine passion for exploration and the art of gastronomy in an unending ode to the senses. When I’m not traversing the globe, I find solace in the earth beneath my fingertips, tending to my garden and working on projects around my verdant oasis. MK Library serves as a beacon, guiding fellow travelers and homebodies alike to embrace sustainability, nurturing both our planet and our souls with purpose. Full Bio.


