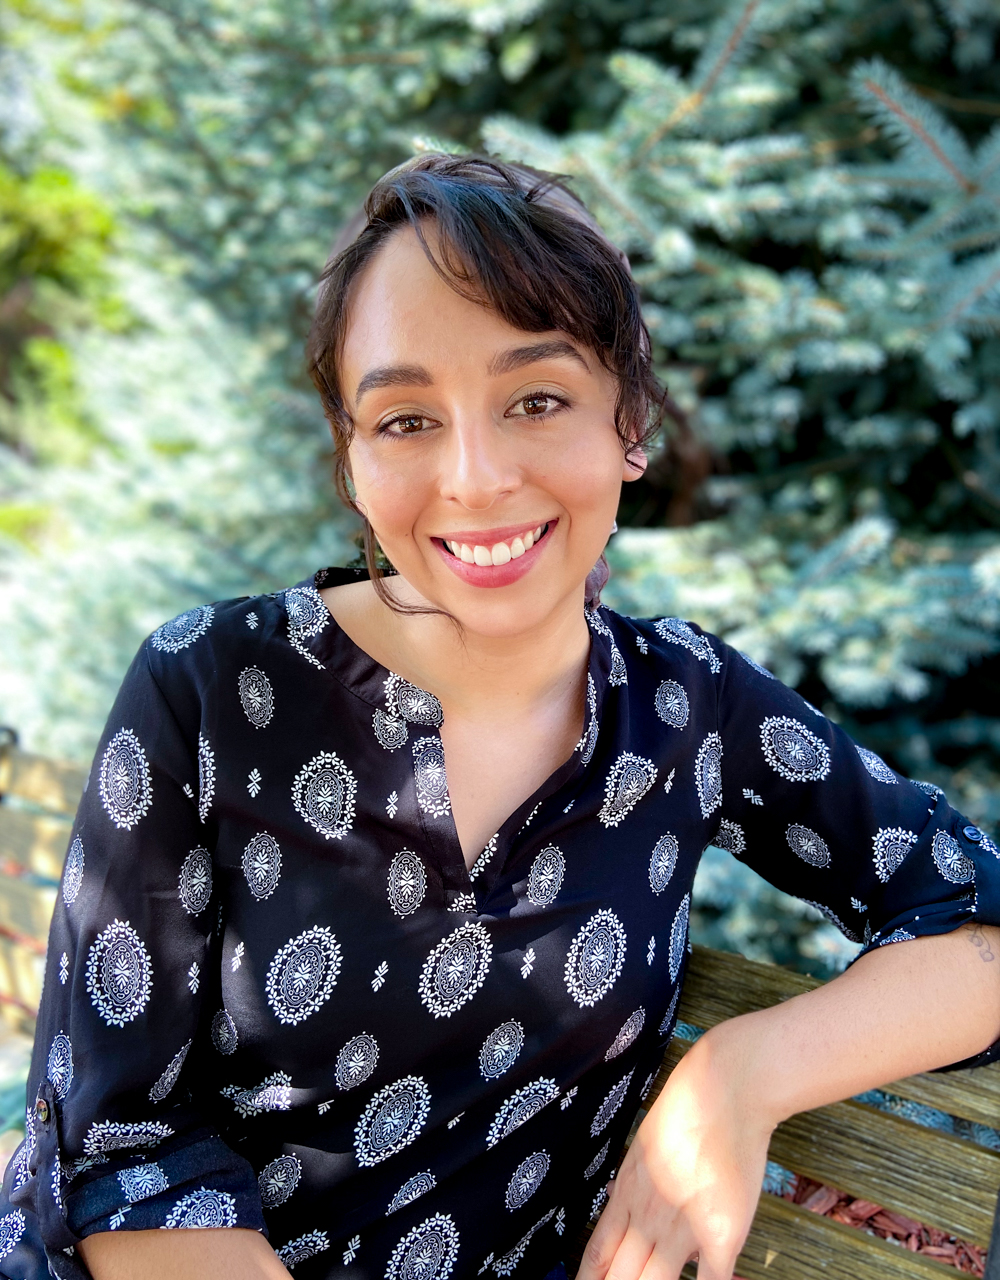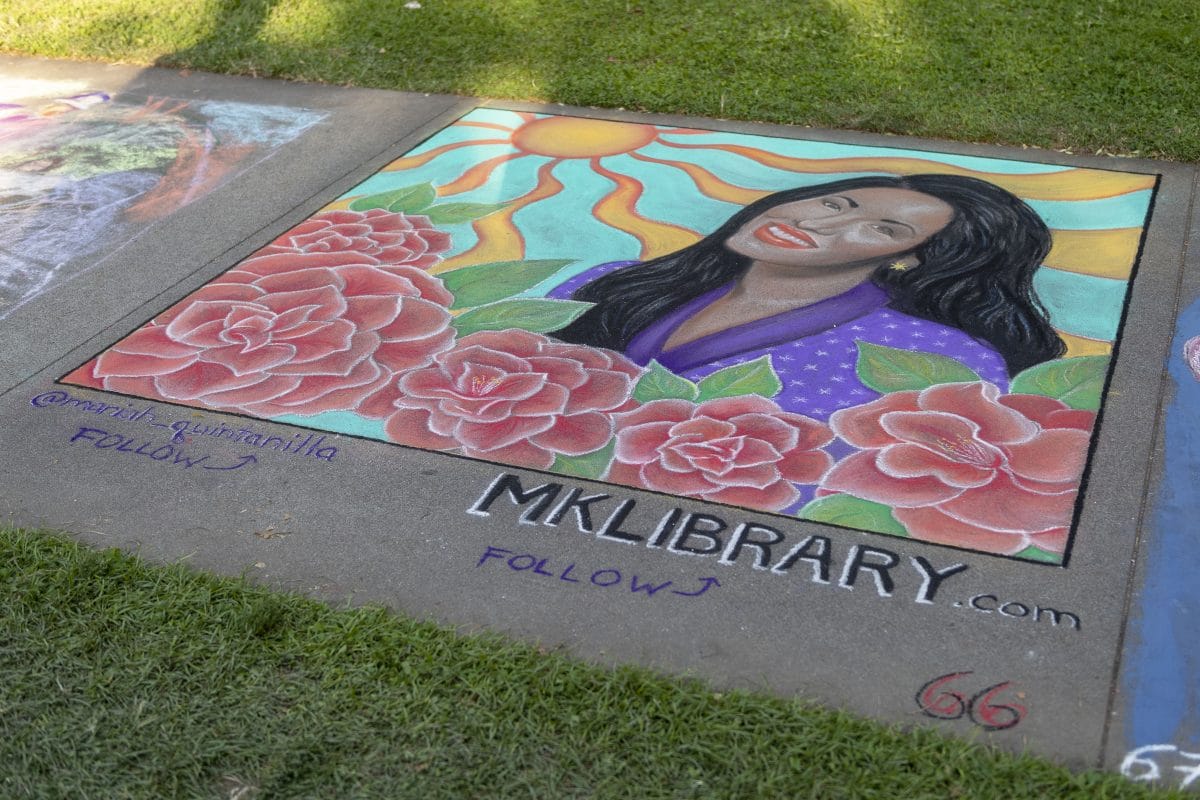
Apart from drawing hop-scotch squares as a child, I had zero experience creating chalk art before participating in this year’s Chalk It Up Art Festival in Sacramento.
Participating in Chalk It Up turned out to be incredibly rewarding. The long days chalking in the Sacramento heat were challenging, but I was satisfied with the end result. Most of all, I enjoyed hearing the positive responses from passers-by. Thank you to my employer MK Library and owner Michael Kahn for sponsoring my square and pushing me to attempt this new high-risk, high-reward art form.
The festival had a great turnout, full of talented local artists, artisans, musicians, and street food vendors. If you are planning on participating in a chalk festival for the first time or are simply curious about my process, read on! I also share some learned tips for newbie chalk artists.
To see more of my art, feel free to check out my Instagram and website.
Table of Contents
Preparing for Chalk It Up Sacramento
I am a perfectionist at heart. Having never attempted chalk art before, I was understandably nervous about participating in this event.
The best relief for my inherent anxiety about things not going to plan is preparation. Of course, a little luck never hurts. I started preparing for the event by figuring out the theme of my future design.
As my sponsor for the event, Michael had no strict requirements for what he wanted to showcase in the design. I had free reign over the artistic process. The freedom of having a world of options at your fingertips can sometimes feel daunting.
Michael suggested tying in some element of Sacramento, so I began brainstorming iconic imagery for the city. I love botanical drawings, and one flower that has always represented the city of Sacramento is the camellia. I decided would incorporate camellias into the design, but I still needed a main attention grabber.
There is a strong Mexican influence in Sacramento, which led me to my next thought; I would love to honor my Mexican heritage in some way. I knew incorporating an icon that people could identify with would be a real crowd-pleaser. Who better to feature than the iconic Mexican-American Tejano singer, Selena Quintanilla? Selena has always been an influential figure in my life. She also happens to be a distant relative, so this felt like the perfect choice. Now, all that was left to do was begin sketching different iterations of the final art piece.
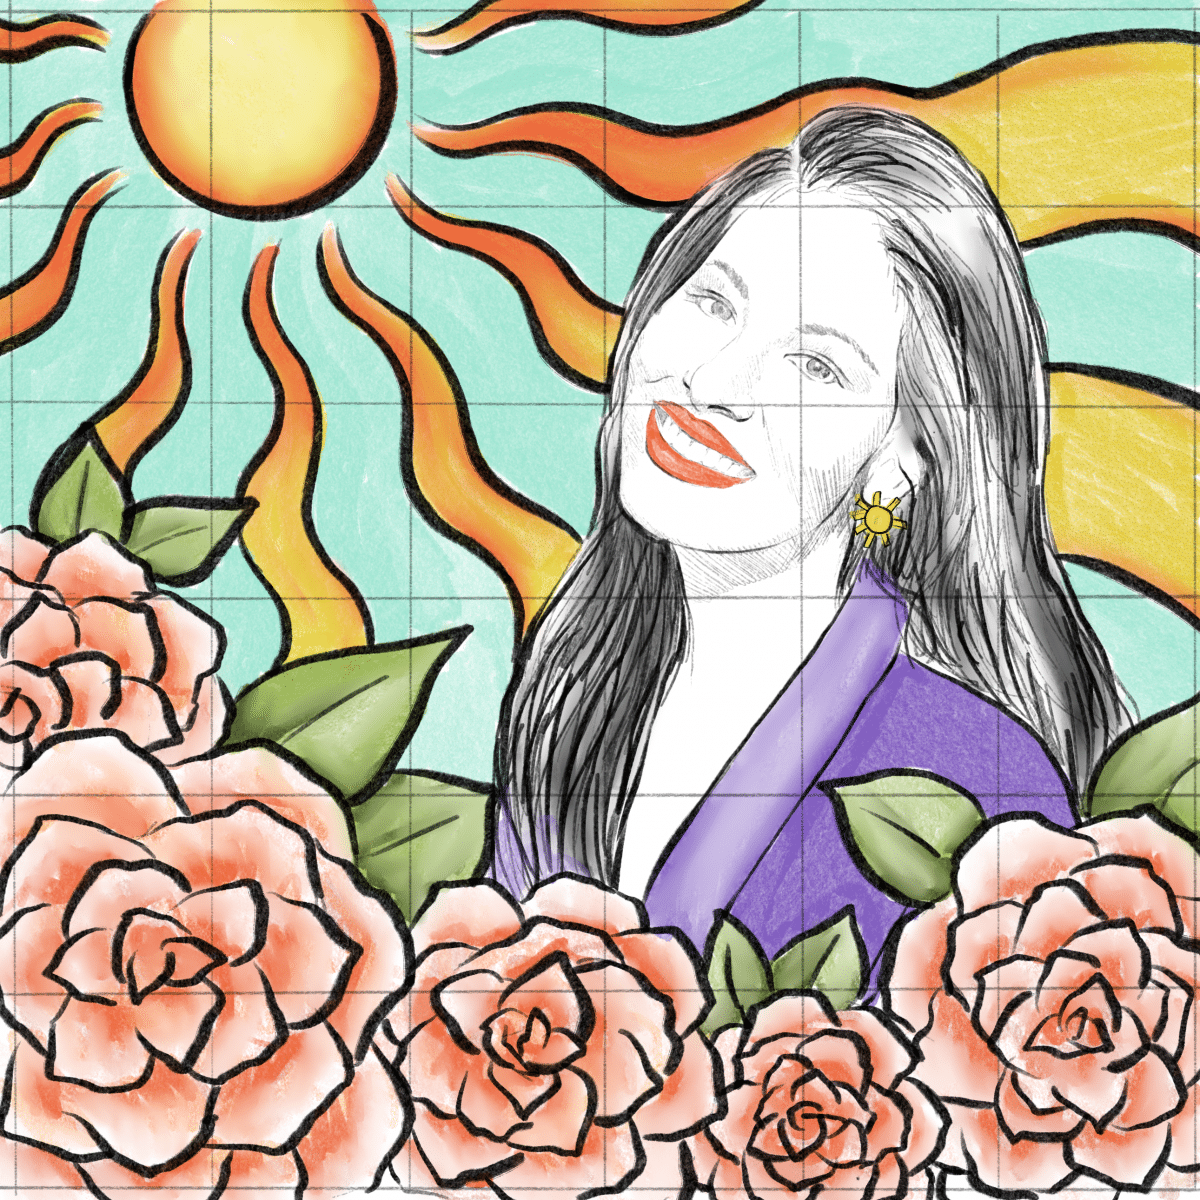
Over the course of two weeks, I came up with about three versions of the final design. In the end, I went with the simplest version. It featured Selena laughing in the corner, with a bright yellow sun fading into wavy orange sun rays behind her. Camellias lined the bottom of the square.
A somewhat simple design would allow me plenty of time to get Selena’s face just right. Although I was happy with the overall design, I was still nervous about capturing her likeness in chalk.
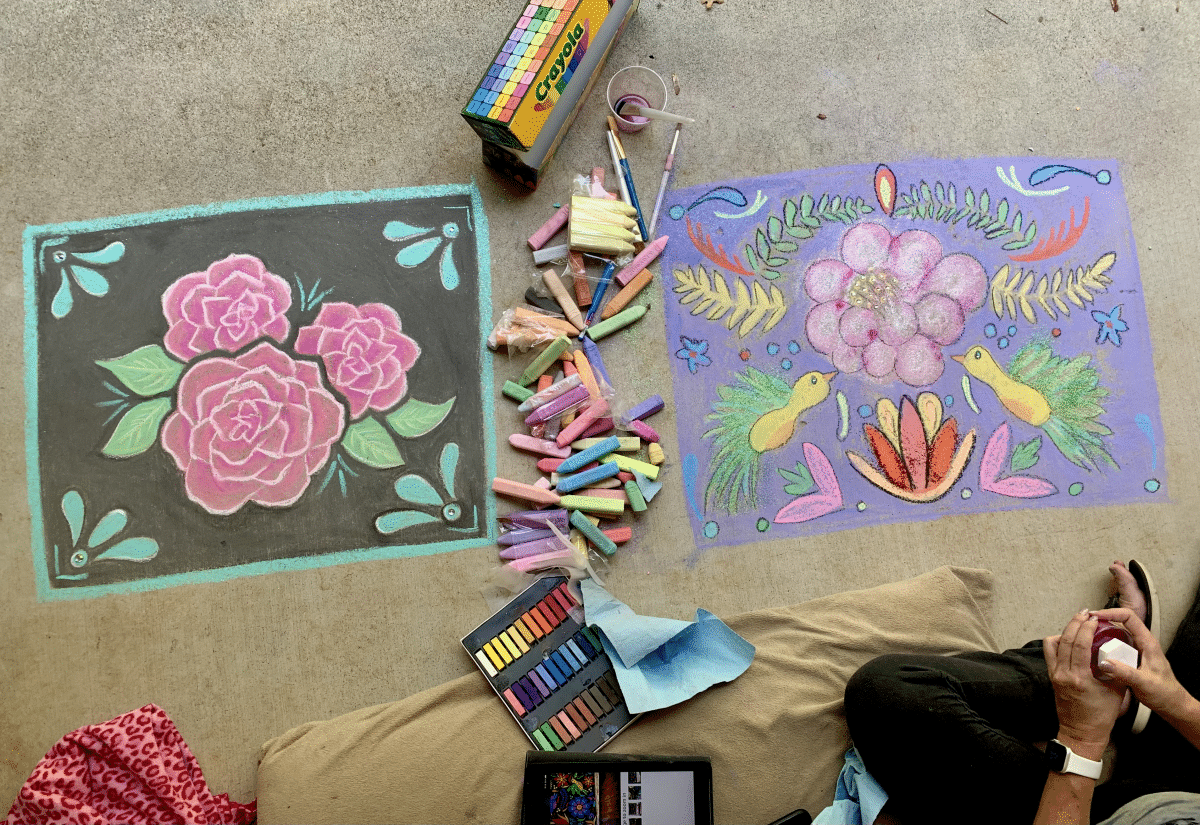
To get the feel of using chalk, I spent some time drawing on my parent’s cement patio with different chalks and pastels. I played with color and determined which chalks I would use to create Selena’s face tones. Although I was not 100 percent confident (I never am), I was finally ready to take on the final design!
First Day Chalking
The event started on Saturday morning and lasted until Monday. Determined to finish the 6 by 6-foot chalk drawing by Sunday afternoon, I arrived in Sacramento bright and early at 7:30 a.m. I began by sweeping off my space with a borrowed broom. Then I got to work laying down a 6 by 6 grid. My mom stepped in to help lay down the chalk lines.
After drawing a grid, I began lightly outlining the elements of my design in white chalk. I printed out pictures of my design beforehand for reference. These beginning steps took me at least two hours. Once I was happy with the outline, I started chalking Selena’s face. I knew this part would be the most challenging, so I wanted to get it out of the way first.

By 10 a.m., the sun had taken over my square. I was thankful for the small beach tent that we decided to bring. The most challenging part of the whole weekend was keeping up my energy in the hot sun.
As I worked throughout the day, people would walk behind me and take pictures of my work in progress. Some asked who it was I was drawing. Surprisingly, many people who approached me recognized Selena right away, even before she was fully completed. Hearing the approving murmurs of people passing by gave me a boost of confidence.

I started to feel the exhaustion set in by late afternoon.
It had been a long day, albeit with very few setbacks. By 6 p.m., I was happy with my progress for the day. I had finished Selena’s face and body, as well as a few camellias. My mom and Michael helped me drape a large plastic sheet over my art, which we held down with small stakes and tape.
It was time to take a shower, eat some well-deserved dinner, and rest my aching body.
Second Day Chalking
The next morning, I arrived at my square with coffee in hand and ready to work.
I uncovered my square and was pleasantly surprised to see it in the same condition I left it the day before. Some uncovered works nearby were unfortunately smudged by careless pedestrians (a risk you take with chalk art).
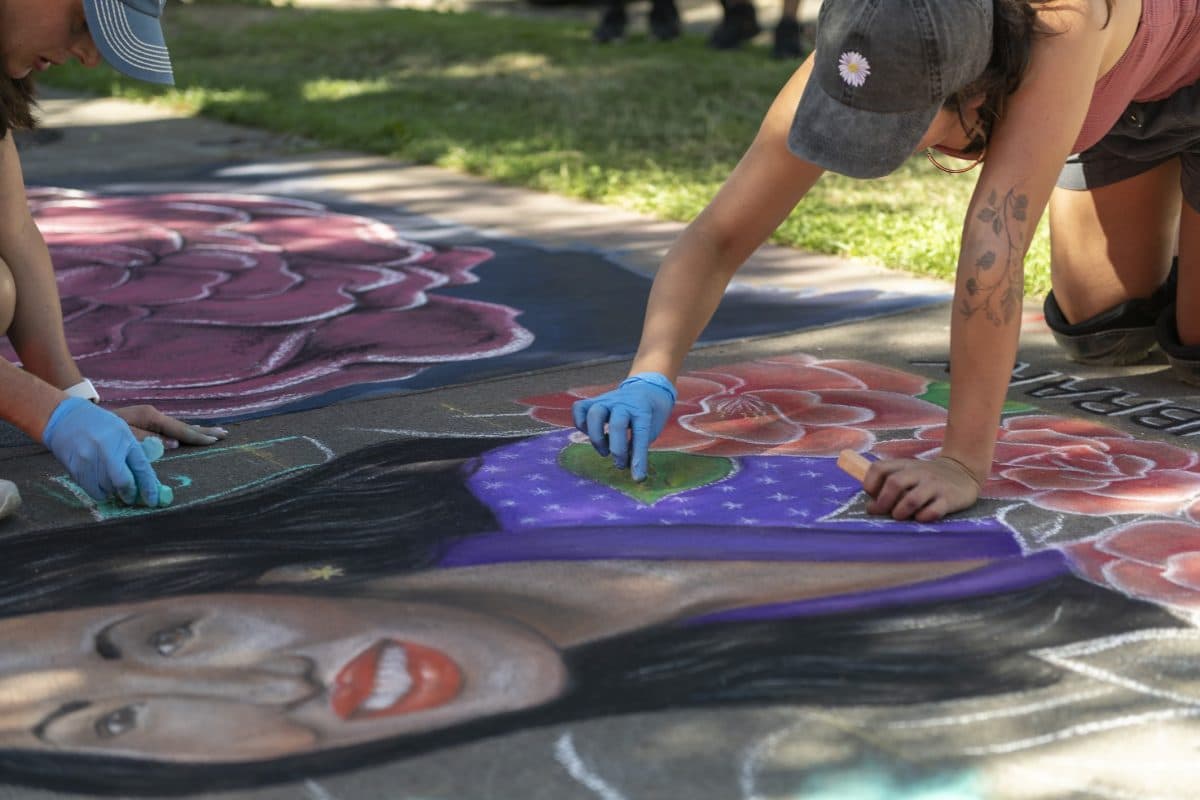
Today’s chalking went much quicker, as I was simply coloring in the camellias and sun.
I was surprised by the amount of positive responses my art garnered from passersby. It was a truly amazing experience seeing everyone from little children to the older generations reacting to Selena’s portrait. One guy wearing a Selena shirt was directed to my art square by random people who had seen my artwork. My favorite response, however, was from two small girls. They ran up to my square and exclaimed, “Oh. My. God!” in unison.
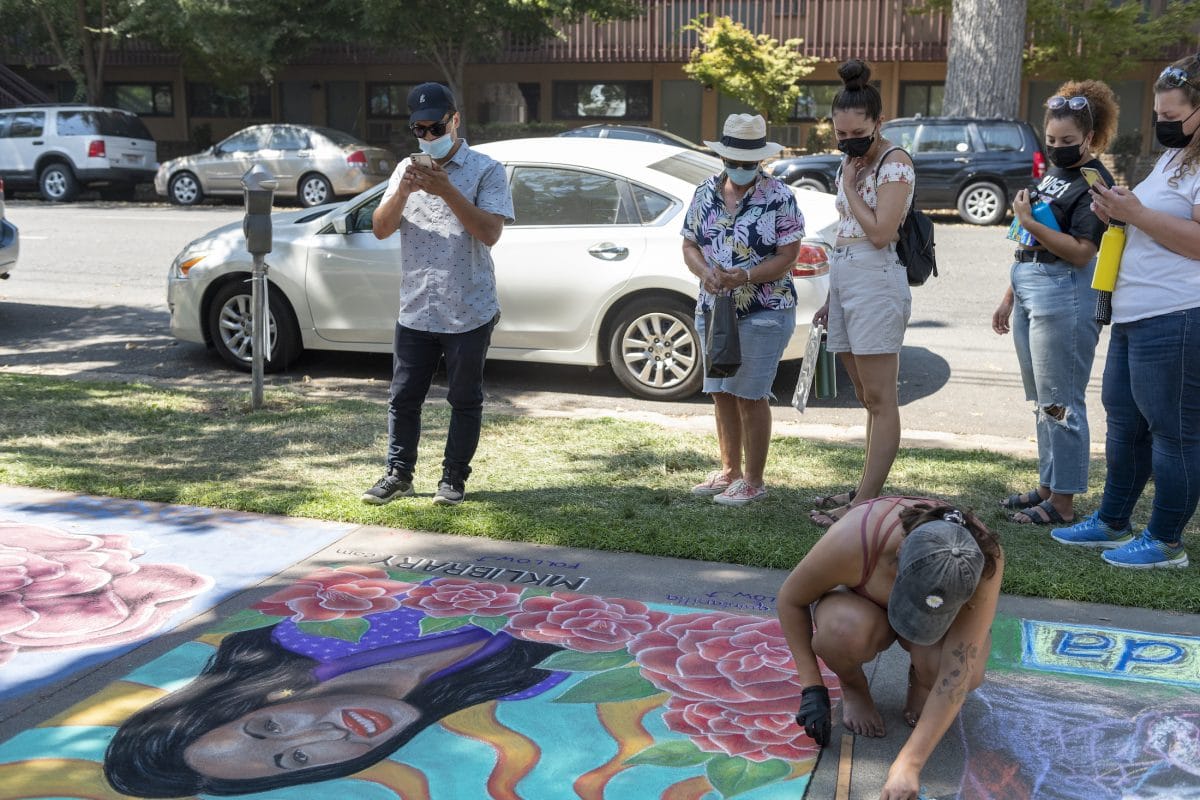
My entire family had made the trip down to Sacramento and were proudly promoting my art to onlookers. Michael was also there cheering me on and documenting the experience. I had planned on outlining some sections in black, but decided that my body and mind had had enough for the day.
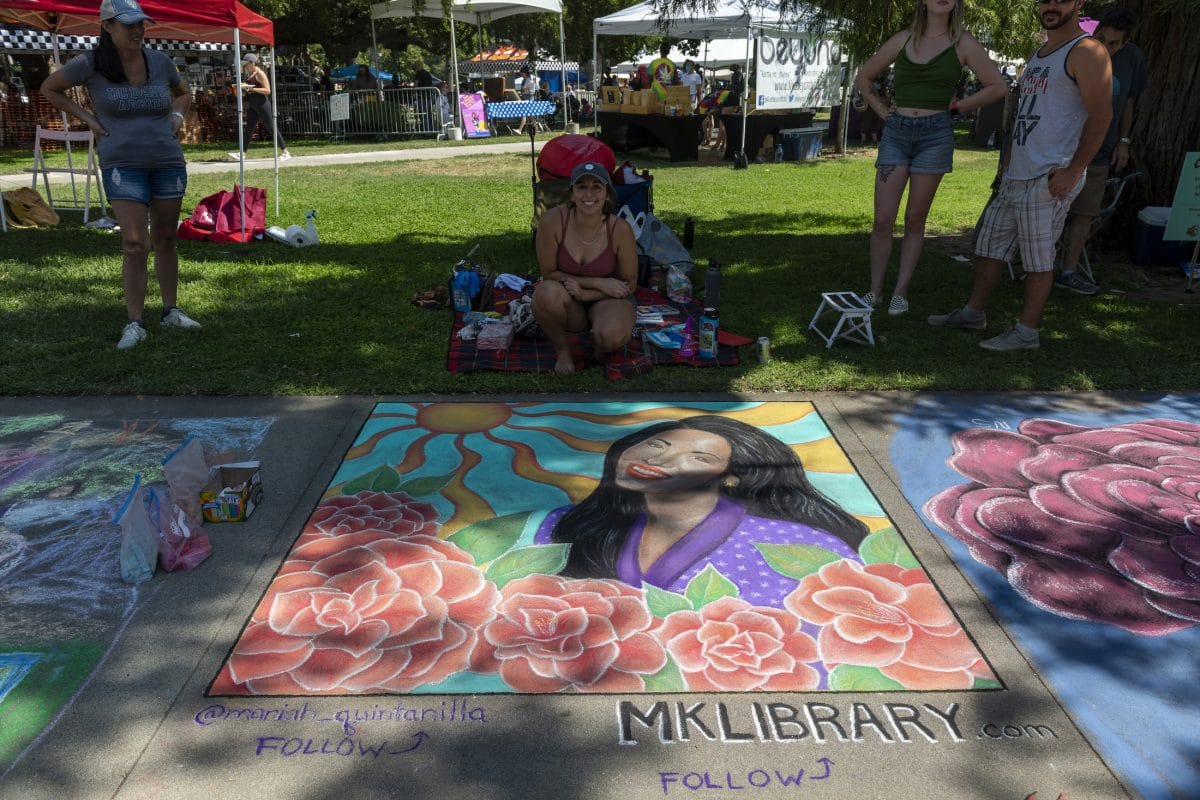
I finally finished the square completely around 2:00 p.m.
The final piece turned out better than I had expected. I was anticipating having to come to terms with my final image not looking exactly like Selena. In the end, however, the resulting chalk art looked realistic enough that people who knew Selena’s face recognized her immediately. This fact, along with the overall composition and color intensity of the chalk, made the resulting art piece a success in my mind.
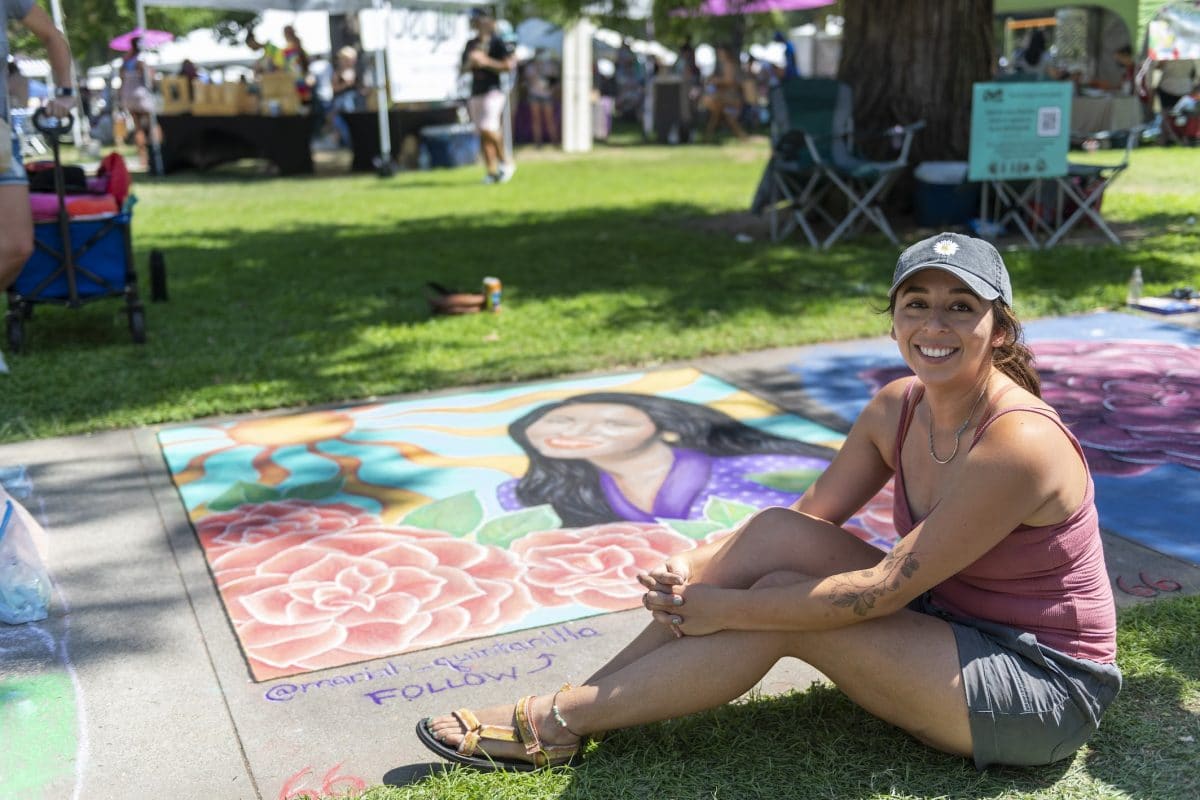
We packed our things and took one last picture before making our way around the park to check out all the other amazing artwork. Many talented chalk artists came out to represent local companies and organizations. It was a great weekend, full of art, music, and delicious food.
Determining which chalk to use
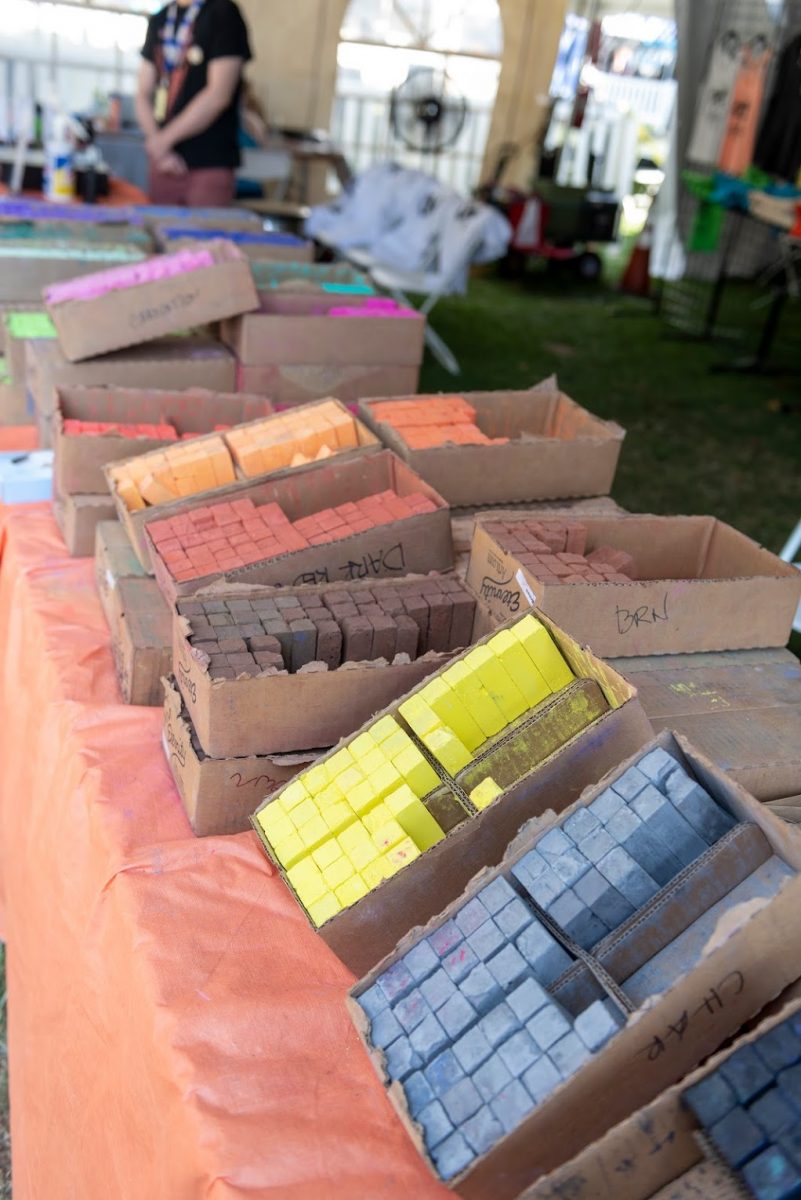
I used a variety of different chalks and soft pastels to create my art piece. At home, I practiced with a 64-pack of kid’s Crayola sidewalk chalk, but the chalk was hard and the colors somewhat dull. I wanted deeper, brighter colors, so my boss purchased this street pastel set. I used a few of these colors in the sun and background and was not disappointed. The color was rich and vibrant.
For more detailed sections, I used a set of soft pastels that can be found at any art store. These worked well and were easy to blend. Chalk It Up also provided participating artists with 10 blocks of high-quality buttery chalk from Eternity Arts that were also vibrant and blended nicely.
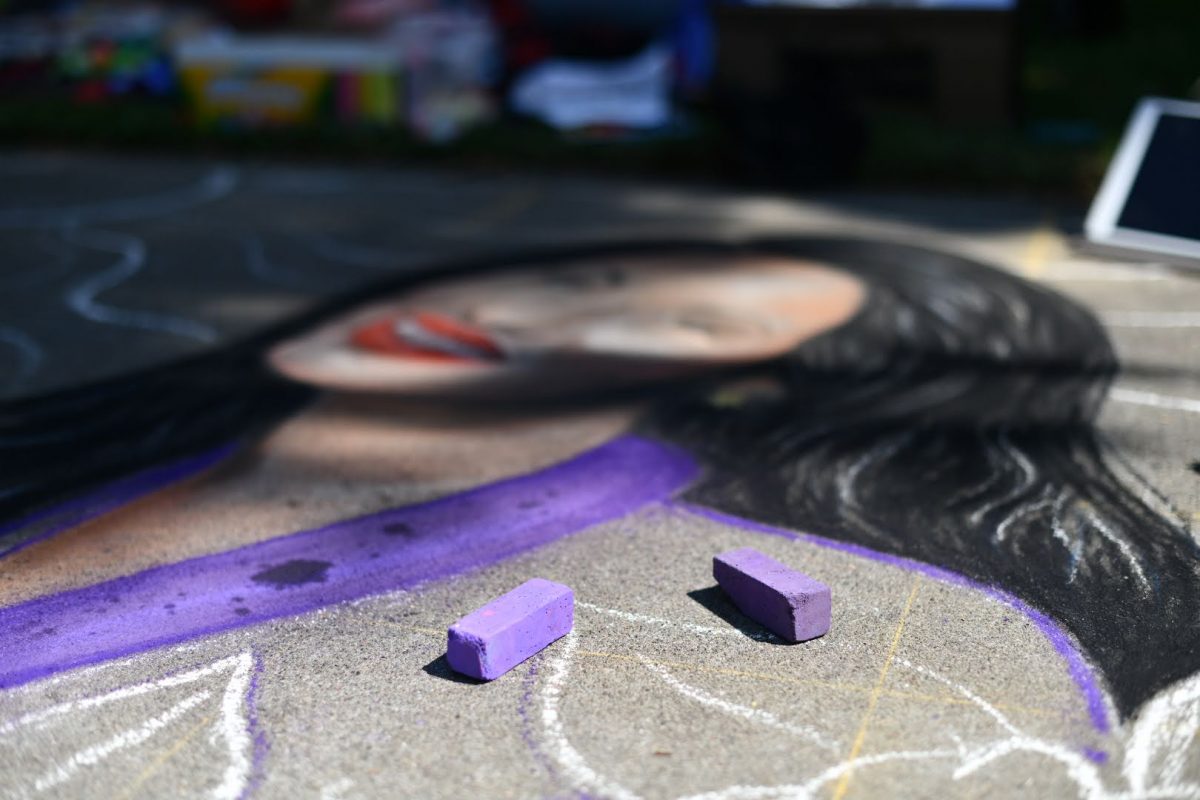
Needed supplies:
- Thick paper towels: For smudging. Other people used bits of carpet liner or any other textured material that won’t break apart on the cement.
- Broom: For cleaning your square beforehand.
- Sun protection: This includes a hat and sunscreen. An easy-up is a great idea if you are in direct sun all day.
- Chalk: Duh.
- Spray bottle: For misting your art intermittently, allowing you to layer colors on your chalk.
- Knee pads: Either painter’s knee pads or a gardener’s knee mat works great. I was grateful to have the padding on the rough cement. I also used a yoga block to reach tough spots in the middle, as well as a mini stool to sit on.
- Paintbrush: For erasing or smudging lines.
- Yard stick or measuring tape: For creating your grid before you begin chalking. I also brought a chalk line tool, which made creating straight lines quick and easy.
- Reference pictures: I printed out all the pictures I needed for my chalk drawing so I could reference them throughout the day. Keeping them all together on a clipboard is helpful.
- Snacks + water: Stay hydrated throughout the day and make sure to keep your energy up.
- Latex gloves: These aren’t necessary, but they keep your hands clean and are even good for blending on smoother cement surfaces.
- Large plastic cover + tape: If you do not finish your piece in a single day, you will want to cover it before you leave it for the night. This will not only save it from debris/water from ruining it over night, but it will deter people from walking or biking over your art.
Chalking tips I learned along the way

Here are some useful chalking tips that I learned throughout the weekend:
- Spray, spray, spray – My spray bottle came in extra handy for setting my chalk layers. Chalk is a messy medium that can easily smudge and spread when there is too much build-up. The mist helps the chalk set into the cement.
- More chalk is not always better – In the same vein as above, I learned that a little chalk goes a long way when you are layering and blending colors. When I was coloring in the camellias, I only needed a tiny bit of red to get the desired ombre effect on the pedals.
- Drink plenty of water – Working for over 10 hours in the hot sun can take a toll on the body. There were times when I’d get a little dizzy after standing up. This likely happened because I was not drinking nearly enough water. Staying hydrated and eating throughout the day is extremely important if you want to have a safe and successful chalking experience.
- Use a smudger – Smudging your chalk instead of chalking right up to the edge will help you achieve smooth, clean lines. I used paper towels to smudge and blend. Others use their fingers, carpet liner, or any other soft material that will hold up against the rough cement.
- Add a base layer of washable paint – Although not allowed at Chalk It Up, many other street chalk festivals will allow artists to put down a layer of black or white washable water-based paint on the cement before chalking. This helps even out the cement surface and allows your chalk colors to really stick and be vibrant. When permitted, I prefer this method.
- Drink with caution – You will undoubtedly need to drink a lot of water while chalking, but I warn you that drinking water too close to your art could end in disaster. We had an unfortunate incident of spilled water at a following chalk event. The spilled water could have washed all of my work away if it wasn’t for a fortuitously placed sidewalk crack.
More Chalk It Up Sacramento 2021 Pictures


To view all the photos MK Library took at the Chalk It Up Festival for 2021:
https://drive.google.com/drive/folders/1mWCwU4WYFFZGmWSKxqWc1TTfSu23wZow?usp=sharing
Please review the photo terms in the link before continuing, but generally speaking:
- All photos are free to download or view.
- All photos may be reshared for free on social media accounts with attribution.

