Running high traffic sites means WordPress optimization is absolutely crucial. I spend a lot of time reading, thinking, and testing configurations to constantly improve the performance of my WordPress blog, as well as the server load. When sites are getting over 100,000 visitors per month, every millisecond counts. Whether you are running a blog, enterprise site, or local business, ensuring your visitors and customers have a fast speed can make all the difference between someone who clicks away and someone who stays for a while.
WordPress Optimization: A Comprehensive Guide for Bloggers
This living-document guide began in 2016. It undergoes constant growth and modifications, using real-world experience. Experience is drawn from putting these tasks to practice on both this blog and clients through my WordPress-focused web development agency. Site size ranges from enormous enterprise operations. As this document continues to evolve, it covers speed, security, and general best practices when using WordPress.
This post is formatted in a way that starts with the lowest hanging fruit and gets harder and more complex the farther down you read. Optimizations are also organized in a cascading order, where some will not help nearly as much if you skip some of the steps. Begin your WordPress optimization from the top and begin measuring results!
This step-by-step optimization guide has been tested on two different server environments. One is a VPS which receives over 200,000 visitors per month. The second is a dedicated server that receives over 800,000 visitors per day. Countless benchmarks and improvements have gone into each server, improving its speed and reliability.
If you get through this entire list and need help, I am available for hire on a case-by-case basis – this sort of thing is fun for me.
If this entire guide is entirely too much for what you want to do and I’ve talked you out of the DIY approach, I’ve found Kinsta to be the gold standard for managed WordPress hosting, performing most of these tasks already on their own managed hosting plans.
Disclaimer: This post includes affiliate links for some of the products mentioned, however, I am not being compensated to endorse any of the products.
Disclosure on the results of this blog: I run ads on this site, which will always skew results and make the site load much more slowly. If you run an ad-free site, you will experience enormous benefits from using this optimization guide.
Checking WordPress optimization speed and waterfalls with Pingdom
WordPress Web Hosting
The first step in Wordpress optimization is choosing a good web host. As a web developer, I’ve used and been exposed to a huge variety of web hosts. I’m ultra-picky and want the very best available for my budget and needs. I use iWFHosting. Their solutions include server management, which is awesome on multiple levels. I can’t say enough good things about this company, their integrity, and 24/7 support.
A lot of people running WordPress websites are going to be on what’s called “Shared Hosting” plans. While these are not inherently bad, a lot of times web hosts overload the amount of customers on a single server, causing a slowdown for everyone.
With the amount of traffic my blog brings in, I’m beyond the shared hosting spectrum. I run a VPS, or virtual private server. Running a VPS allows me to quickly scale on necessary, providing the necessary power and bandwidth to run a speedy website.
Current stats on the VPS which is receiving over 200,000 visitors per month:
As you can see, these aren’t incredibly expensive solutions to purchase. If you’re running your own business or are using a blog to provide income like me, you should at the very least be on a VPS. Nearly 0 downtime and an ultra-fast server means customers are much more likely to spend time on your site and purchase whatever you are selling.
Beyond Hosting – A CDN for WordPress
With a good web host selected, the next step in WordPress optimization is getting a content delivery network, or CDN setup. A CDN is essentially a network of servers around the world which duplicate your content and serve it as quickly as possible via whichever server is closest to the visitor browsing your website. I ended up with StackPath for several reasons. The first being a lot of plugins support integration with their API. The second being their support and speed were excellent. I’ve bugged them multiple times with silly questions and their expertise has always proved worthwhile.
Using a CDN is essential as part of the WordPress optimization
WordPress Optimization – Core
With a good server setup in place, now we can move on to actual core WordPress optimization. Core referring to the program itself and plugins you may be using. The first step is getting some plugins in place to do some automated tasks. Then, we’re going to analyze what the WordPress site is currently loading, and then install a few more plugins and optimize the theme.
WordPress Plugins to Help Auto Optimize
WP Rocket This is one of the best automatic non-configuration-required caching plugins I’ve found and used. In addition to doing everything you need to do with minimal configuration on your end, it also plays VERY nicely with the server setup we’ll get into later on, with some great integrations.
This includes CDN support for ALL networks – not just for 1 or 2 CDNS like many other plugins out there.
The plugin also minifies CSS and javascript, which will allow you to dump any extra minify plugins.
Oh, did I mention it includes database cleaning tools for post revisions and transients? Go ahead and dump your extra plugins for that, too.
This plugin is a premium plugin, at $49 per site, and is oh so worth it.
This will tie your WordPress website into your PHP extension Memcached, listed further below in the steps. It works alongside WP Rocket, so don’t worry about running multiple caching plugins.
WP Rocket uses opcache, Memcached Redux uses memcached. Two different types of cache, both are needed.
CAOS for Google Analytics allows you to host analytics.js locally and keep it updated using WordPress’ built-in Cron-schedule. This integrates with Monster Insights and Analytify beautifully.
Host the Google Analytics file locally
Heartbeat Control WordPress has an API that autosaves drafts which by default goes every 15 seconds. This plugin lets you change the frequency to every 60 seconds. There is an option to disable where it runs, but I kept it everywhere so future plugins or features aren’t affected. I could totally see myself spending an hour trying to figure out why a plugin doesn’t work, only to realize its a setting here.
WordPress Heartbeat Control
Note: If you use WP Rocket, you can use that plugin setting’s instead of Heartbeat Control.
I like to use this plugin, even if I already setup the site to use https. This automatically sets up all the proper redirects and makes sure rogue images and scripts use the proper protocol.
Really Simple SSL settings page for https
Handy tip for Really Simple SSL: It adds a snippet to htaccess for the redirects. If you ever need to remove them due to certificate errors or another issue, this code will mass remove the code from every htaccess on the server without touching anything else. Credit to iWF Hosting:
perl -0777 -i -pe ‘s/# BEGIN rlrssslReallySimpleSSL.+# END rlrssslReallySimpleSSL//sig’ */public_html/.htaccess
The free version is exceptional, so is the Premium worth it? The times I use Premium or recommend it is when there is private information being shared. Are there customers filling out forms, placing orders, signing up for things? Anything else where a site visitor might be sharing more than an email and name for something like an email list? Then get the Premium version, which is $29/year.
It adds in security headers and HTTP Strict Transport Security which is an additional level of security to prevent phishing or attacks. Secure headers include: X-Content-Type-Options, X-XSS-Protection, X-Frame-Options, Content Security Policy, Expect-CT, and Certificate Transparency.
WordPress Image Optimization
You may have noticed I left out an image optimization plugin suggestion. Well, that’s cause I feel like it deserves a section of its own.
I had been using EWWW Image Optimizer for years with great success. With a newer update, their free version changed a bit and for the optimizations to truly make a difference, a paid solution was required. It was time to evaluate new options.
There are a ton of other blog posts out there dedicated to uploading the same image using a bunch of different WordPress optimization plugins and comparing the results. I never did the same thing, so if you’re looking for hard numbers and percentages saved, you’ll have to read some other guides. However, the ones I tried were all effective in their own ways. The image optimization plugin industry seems to have moved towards requiring a premium or paid option if you want any sort of recognizable results.
After pouring over tons of blog posts, consulting with other bloggers, and trying out a bunch of different optimizers myself, I quickly grew to love a new favorite.
Imagify plus WP Rocket automates everything. I rely on high quality photography, so my settings are set to lossless, but you can leave it on the AI which will automatically figure out the best settings for you.
If you aren’t using WP Rocket, another great plugin is ShortPixel.
First off, don’t judge me on the 200,000+ images. I have a problem and I know it. Second, this another plugin is worth paying for. There are two paid options: monthly and a set amount of images. Depending on how often you are uploading images and publishing new content, you’ll have to decide what makes the most sense. The free version does provide 100 images per month, but this can easily be used up in 4-5 uploads, variables being your theme and plugins, as each image size counts towards your optimization count.
ShortPixel Image Optimization WordPress Plugin – General Settings
One of my favorite features of this plugin is the integration of the WebP format. ShortPixel supports adding it to your images and handling all the heaving lifting. If you’re optimizing for Google Lighthouse and super fast speeds, this will really make a difference beyond JPG or PNG optimization.
WebP is a modern image format that provides superior lossless and lossy compression for images on the web. Pioneered by Google, they claim:
WebP lossless images are 26% smaller in size compared to PNGs. WebP lossy images are 25-34% smaller than comparable JPEG images at equivalent SSIM quality index.
Lossless WebP supports transparency (also known as alpha channel) at a cost of just 22% additional bytes. For cases when lossy RGB compression is acceptable, lossy WebP also supports transparency, typically providing 3× smaller file sizes compared to PNG.
Best practices will have you using the <PICTURES> tag syntax for including WebP and a fallback for unsupported browsers. Luckily, ShortPixel supports this. The option using WordPress Hooks is recommended, as it is safer.
In the screenshot below, you will see the cumulative optimizations between WP Rocket, ShortPixel, and StackPath CDN. Go ahead and inspect the screenshot below or image above to see the live code.
WordPress image optimization with WP Rocket, and ShortPixel Stackpath CDN to serve WebP
Optimizing images for free [outside of WordPress]
While I strongly believe some things are worth paying the premium fee for, I understand it isn’t in everyone’s budget. You can manually optimize original sized images using one of my favorite tools, TinyJPG. In return for free image optimization, you’ll have to incorporate a few extra steps. The service is excellent and I’ve used it plenty of times for random images. They also have a Photoshop plugin which optimized within Photoshop, although I haven’t tried it.
Optimize Images outside of WordPress for free with TinyJPG
Analyzing Your WordPress Performance
Head over to either GTMetrix or Pingdom. Or, do both and see how the different companies analyze your site, cause you’re just as particular as me.
This is what a typical graph will look like as I optimize a WordPress site, testing as I go. I was already familiar with my own site, so the process didn’t take as long, but it generally takes anywhere from 2-6 hours to optimize a WordPress site before even getting to the server itself.
Going off the GTMetrix waterfall view or the Pingdom File requests view, the first thing I look for is how many fonts are being loaded. A lot of times themes or plugins load multiple themes. Your site should have a consistent brand and look, so this will accomplish several things. Removing extra fonts from loading will improve your branding, as well as reduce the number of requests for your site to load.
Next, look for any 404 errors that are popping up. Go and find out what is missing, and fix those. For example, in testing this site, I realized I had a 404 image that was causing a huge slowdown. Oops.
I like to check out the 200 response code request. This is going to be the first one in the list and the most crucial. This is also where caching will shave off a lot of time.
Keep analyzing the waterfall as you go, and take care of different items that seem out of place to you. Try playing with BWPM to get to the ideal configuration.
Remove, minify, or modify one item at a time, flush your cache, and retest. If something breaks, its easy to undo what you just changed, versus guessing over multiple items. This is the most tedious of the entire process and takes a lot of close scrutiny. You’ll also have a much better understanding of how your website works and dependencies when you’re done.
High Traffic Websites and wp-cron.php
Every time a visitor goes to your site or loads a page, wp-cron.php is triggered. This is WordPress checking to see if it needs to do anything. This includes checking for updates, scheduled posts, email notifications, or a number of other tasks. When your website is getting several thousand or more hits per day, this uses up resources unnecessarily. Disabling the default wp-cron.php will be a lifesaver.
Open wp-config.php and add the below code. I usually place new code near the debug function.
define(‘DISABLE_WP_CRON’, ‘true’);
Now, login to cPanel and setup a Cron Job to hit wp-cron.php twice per hour. Change the domain.com to your domain and make sure the path is correct, especially if you’re on a subdomain or subdirectory.
Every time you save a post, WordPress saves a version of that post in the database. These are all accessed via the Revisions interface. WordPress will keep saving every version indefinitely. I ended up with 48 revisions on this post alone in writing the initial version. Figuring out an appropriate number of revisions for your style and setting that will reduce the size of the database. I personally set mine to 3 via wp-config.php:
define(‘WP_POST_REVISIONS’, 3);
Increase WordPress Memory
The default WordPress memory limit is pretty low. 40MB, as it just so happens. This is not enough for many many environments. Why is it set so low by default? This is so WordPress can run lean and mean on many servers, with users not required to purchase high end equipment. However, if you’re reading this, you’ve already upgraded to a VPS or dedicated server and are ready to increase the memory. If you leave well enough alone, you’ll encounter quite a few errors and timeouts on the backend. 128M is a good starting point, assuming your server has more than 4GB of ram. Add this code to your wp-config.php:
define( ‘WP_MEMORY_LIMIT’, ‘128M’ );
Prefetch Common Domains
Prefetching is similar to caching. You are instructing the browser to lookup DNS requests before they are needed. This allows pages to load much quicker later on. Add these to the header of your theme. Either use your theme customizations or a plugin to make this happen. I use WP Rocket to integrate with my other caching optimizations. I also include my CDN domain, which is not listed.
If you want to add domains into the <head> manually, here is some sample code:
I personally use WP Rocket to Prefetch to keep management simple and easy. For a starting point, you can use this list formatted for WP Rocket. Remove anything not relevant to you, and add domains as necessary. Note: Don’t add any advertising domains.
Prefetch settings for WP Rocket
For a quick and easy way to determine which domains should be Prefetched, open up Google Chrome, navigate to your website’s homepage, right click, and hit Inspect. When the Inspector panel shows up, click on the Audits tab. Scroll to the bottom and click Run Audits. Once it is complete, look for a section called Preconnect to required origins. You’ll find a nice list of URLs to copy and paste either into the settings of WP-Rocket.
Miscellaneous WordPress Notes
Too many plugins equals a slow site – This is a false myth. I currently have 50 active plugins on this site, and another 20 or so which are inactive. I get load times in under 3 seconds, and often under 1 second.
wc-ajax=get_refreshed_fragments – This is something which will show up as a slowdown if you’re running WooCommerce or haven’t adjusted your settings within WP Rocket. Its probably a bad idea to disable completely. I run WooCommerce on this site, and the only way to speed it up significantly is to disable the ajax-cart option here: /wp-admin/admin.php?page=wc-settings&tab=products§ion=display
Remove extra fonts being loaded – If you can’t find where fonts are being loaded, or if the theme is loading extra fonts on its own, removing them via BWPM is the way to go.
Themeforest themes are slow – There are several really well made Themeforest themes out there. X is a favorite of mine. However, there are indeed some poorly developed themes that exist in all the marketplaces.
Using a Lightning Fast WordPress Theme
There is a chance you just completed every step outlined above with extreme diligence and your WordPress website is still feeling sluggish. You may want to evaluate your theme.
If you’ve been around WordPress for any length of time, you have most likely heard of Genesis, and may have noticed I didn’t mention that brand. They went through a long period of inactivity and were passed up in speed and ease of use by my recommended themes. I’d love to see them come back with a vengeance, but for now, I no longer can recommend the Genesis themes.
cPanel WordPress Optimization
Optimize Website – This generically named setting is where you can enable compression/gzip of your content.
For the more advanced readers – Zlib for compression is another good option when configuring WHM.
While not directly related to WordPress speed, its a good idea to make sure your DKIM and SPF records under Authentication are valid. These records help fight spam and let’s other mail servers know that your e-mail is authentic.
Advanced WordPress Optimization
Alright, time to take a break, make a fresh brew of coffee, and get ready to dive into the heavier and more advanced areas of getting the most performance out of your WordPress website.
Disclaimer and notice of imminent danger: Modifying settings in WHM could very well render your enter server useless. This guide includes items that can break stuff. If you feel unsure of a setting, or want a better understanding, ask your web host support or search for more information. I am only providing a very superficial overview on many of the following items. WHM supports Dry Runs of some of these settings, particularly EasyApache – take advantage of this, even if it takes you longer.
My current setup is a VPS with 8G Ram, 4 Xeon CPU cores, SSD drive, SolusVM, CentOS 6.8, and WHM56. If your setup is radically different, you may encounter problems. Feel free to ask your web host if these settings are safe.
WHM WordPress Optimization
There is a lot to adjust within WHM. I’m going to go down the menu and just list changed settings related to WordPress performance. There are plenty of other settings you may want to change for security, or based off of a specific website environment.
If there is another setting within WHM I missed which has impacted your WordPress performance, comment with an explanation and let me know to add it. Most of the heavy lifting was done prior to this point, and now that we are in WHM/PHP configurations, I’d love to have some input from others on further performance tuning.
Again, only settings that have been changed from their default and related to WordPress optimization are listed here.
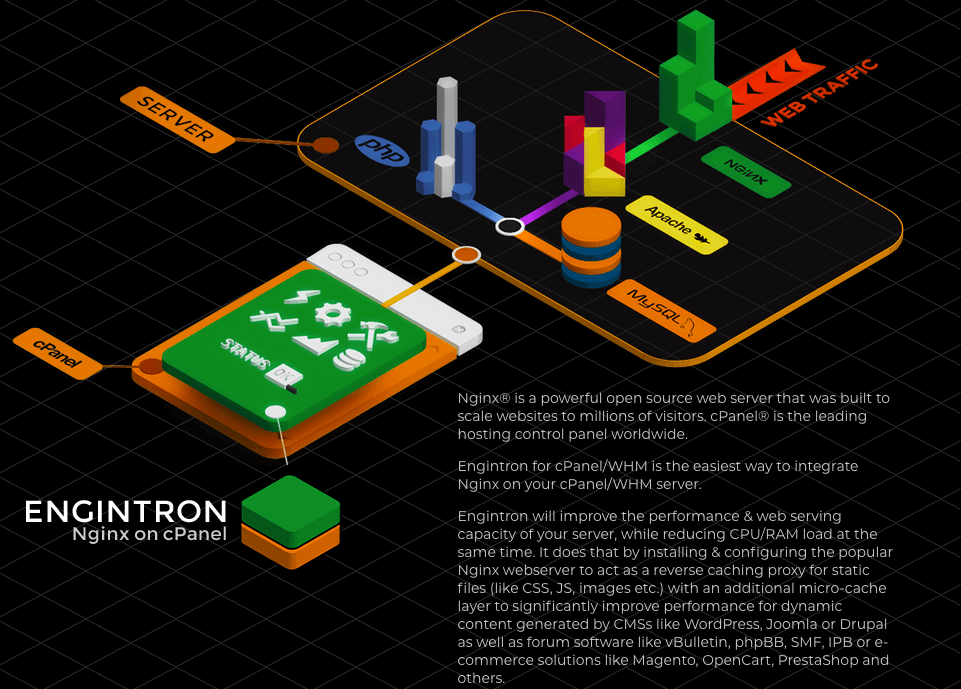
Engintron and Nginx
Engintron coupled with Nginx works as a reverse caching proxy in front of Apache, enabling micro-caching, improves performance, reduced CPU/RAM load, and integrates with WP Rocket. You can read all about it by visiting the Engintron github page.
By default, WHM installs with the BIND nameserver. The nameserver is what points a domain name to the correct IP. PowerDNS is much faster and will decrease your TTFB – time to first byte in the DNS and SSL portions. I went from around 300ms to under 100ms in multiple environments. There are specific situations in which you need to use BIND – in which case you’d know what these are and will ignore this section.
To change nameservers, login to WHM, navigate to Nameserver Selection, select PowerDNS, and click Save. Wait for the window to indicate the process is complete and away you go!
Install APCu
APCu caches only data store. This is not to be confused with APC, which cached opcode and data. OPcache has taken over the opcode cache, making APC necessary – for now. Using both together, with the appropriate plugins is highly recommended. APCu reduces the amount of complex operations WordPress needs to perform on a page request and reduce database access.
From WHM, navigate to Module Installers and select PHP Pecl. Make sure the dropdown for PHP 7.2 is selected, or the PHP version you are using. Search for apcu and hit go. Click on Install next to apcu.
After the install, add this code to your php.ini file:
[apcu] apc.enabled = 1 apc.shm_size = 128M
After making changes to your php.ini, head over to the Engintron Control Panel and restart Apache ands Nginx to make your changes live.
Mail Initial default/catch-all: Fail Email delivery retry time: 60m Enable BoxTrapper spam trap: Off Enable Mailman mailing lists: Off
Stats Programs Enable Analog stats: Off Enable Webalizer stats: Off
This leaves you with Awstats still on and enabled. You should have a specific reason for multiple logging programs to be running. You might also be using something like Google Analytics or Jetpack stats.
System File upload required free space: 128MB
Apache Configuration
Global Configuration
StartServers 5 MinSpareServers 5 MaxSpareServers 10 ServerLimit 500 MaxRequestWorkers 500 (this option was previously called MaxClients in Apache v2.2) MaxRequestsPerChild 4000 Timeout 20
Piped Log Configuration: Enable Piped Apache Logs
EasyApache 4 and PHP7 Configuration
Below is my current configuration. I did not include versions for security reasons and its just extra clutter to scroll through. I’m probably using whatever is listed as the latest. Included is http2. Some of these modules and extensions are required to make full use of the WordPress plugins listed earlier.
; Opcache Tuning opcache.memory_consumption=512 # MB, adjust to your needs opcache.interned_strings_buffer=8 opcache.max_accelerated_files=10007 # Adjust to your needs – should be prime number opcache.max_wasted_percentage=10 # Adjust to your needs opcache.revalidate_freq=60 opcache.fast_shutdown=1 opcache.enable_cli=1 opcache.validate_timestamps=0
OpCache Performance Tuning
To help in in adjusting the opcache tuning in the editor mode above, download the php script from here:
Upload the file to your domain root and it will show you something like this:
As of April 2020, php.ini global configuration won’t actually affect opcache settings. So, load up terminal, and type in:
Wait! Before you do this, make sure you are comfortable with the command line in Terminal. If you are…here is a quick refresher on using Vi:
Type i to enter insert/editing mode.
Enter your text.
Press Esc to enter command mode.
Type :wq and press ↵ Enter .
To exit without saving, press Esc and type :q! followed by the ENTER key.
# cd /opt/cpanel/ea-php74/root/etc/php.d/
# vi 10-opcache.ini
Make the adjustments necessary. Save and exit. Restart PHP FPM to apply changes.
Opcache uses 64 MB of RAM to save compiled PHP scripts and up to 3907 PHP scripts by default. Depending on what’s going on with your server and how many WordPress websites you have, you’ll need to bump this up.
Opcache operates on a first-come, first-serve basis.
To find the right configuration, monitor the output of opcache_get_status(false) to check for the memory, waste and number of used cache keys.
If cache_full is true and a restart is neither pending nor in progress, that means the waste is not high enough to exceed the max waste percentage.
Compare current_wasted_percentage with the INI variable opcache.max_wasted_percentage. In this case, the cache hit rate opcache_hit_rate will drop below >=99%.
Increase opcache.memory_consumption setting.
If cache_full is true and num_cached_keys equals max_cached_keys then you have too many files. When there is not enough waste, no restart will be triggered. As a result, there are scripts that won’t get cached, even though there might be memory available.
If your cache is never full, but you are still seeing a lot of restarts, that can happen when you have too much waste or configured the max waste percentage too low.
To look for inefficient restart behavior you can evaluate the oom_restarts (related to opcache.memory_consumption setting) and hash_restarts (related to to opcache.max_accelerated_files). Check when the last restart happened with last_restart_time statistic.
MySQL / MariaDB Optimization
If you’re like a lot of folks out there, you’re running MySQL 5.6 within WHM. Time to upgrade to MariaDB! MariaDB is a fork of MySQL, which means you can switch back and forth without issue. Although, once you go to MariaDB, you won’t want to go back to MySQL! MariaDB was acquired by Oracle in 2010, and one of its original developer wasn’t happy with how it was being developed, and thus forked MariaDB. So why switch? Faster performance. Anywhere from 5% to 60% faster, depending on what you’re doing. Better security. Faster updates. It goes on.
MySQLTuner
MySQLTuner is a Perl script which checks your current MySQL configuration and makes recommendations to increase performance and stability. For best results, run the script after the server has been operating for a few days or more. The script does not make any changes, but suggests changes for you to make.
Hop into phpMyadmin, backup your entire database. While you’re downloading the backup, look at the scrollbar to the right. Look how far you’ve come. And now I’m going to reveal an incredibly awesome tip.
select your wp_options table, and run this query:
ALTER TABLE `wp_options` ADD INDEX (`autoload`);
This little query has the power to dramatically speed up your website. Especially if your plugins or theme utilizes transients. Are you running WooCommerce? This is a must. Essentially, adding autoload to the options table drastically reduces the amount of rows called upon. Example: 553,749 to 711 rows in one such optimization. You’ll notice a lot of speed improvement in the backend and dashboard of WordPress as well.
Convert Database Engine from MyISAM to InnoDB
If you installed WordPress prior to any of these optimizations there is a very good chance your database is using MyISAM. InnoDB is a database engine which offers signifigant performance gains. Essentially, MyISAM locks the entire table to make a change, while InnoDB locks just a row. When you have a larger WordPress site, the rows in the database can easily reach millions. Imagine every time someone makes a comment, you make a change, or some other change occurs. The entire database table locks and waits. With high traffic, this is a great way to crash the site.
Login to phpMyAdmin. Select the database you want to change the engine for. Paste this into the SQL tab:
SELECT CONCAT(‘ALTER TABLE ‘, TABLE_SCHEMA, ‘.’, TABLE_NAME, ‘ engine=InnoDB;’) FROM information_schema.TABLES WHERE ENGINE = ‘MyISAM’;
You’re going to get a list of queries, most likely with cut off text. Click the +options button and select Full texts, then click the Go button.
Copy everything under the table row header, starting with ALTER TABLE etc…) . Click the CQL tab and past in the list of queries. Hit Go.
You can also do a manual conversion using just your mouse. From within phpMyAdmin, click on the individual table name, click the Operations tab, select the Storage Engine dropdown, select InnoDB, click Go. Repeat for each table.
Congratulations, you’re now using the InnoDB engine!
Apache Optimizations
Apache Tuning with Apache2Buddy
Apache2Buddy is a perl script which reviews your Apache configuration and makes suggestions based on the Apache process memory and RAM, focusing on the MaxClients directive.
I write about the things I actually spend my time on: home projects that never go as planned, food worth traveling for, and figuring out which plants will survive my Northern California garden. When I'm not writing, I'm probably on a paddle board (I race competitively), exploring a new city for the food scene, or reminding people that I've raced both camels and ostriches and won both. All true. MK Library is where I share what I've learned the hard way, from real costs and real mistakes to the occasional thing that actually worked on the first try. Full Bio.
If you buy something from a MK Library link, I may earn a commission.
15 thoughts on “WordPress Optimization – A Comprehensive Guide”
This article is great. I have some question in my mind. If I use Litespeed webserver and cloudlinux os then how I can optimize the server for wordpress. And after installing cloudlinux I can’t upgrade from mysql to MariaDB. Any suggession?
For PHP extensions you can further speed things up by removing these off the above list (they are not needed). This is when the environment is running Apache / PHP 7.4.x +PHP-FPM / Nginx (Engintron) / MariaDB.
Thank you so much for your great post on WordPress optimization. I myself recommend my friends to have a look at your optimization tricks for their wp based websites or blogs. Cheers man!
This is all such good information! I’ve been blogging for almost 10 years now, and the one thing I’ve learned is that nothing stays static, and you have to work smart to stay on top of things. I really appreciate the detailed info on WP plugins: that’s something I need to do a deep-dive into. Pinning for future reference.
This is such an in-depth piece on optimizing wordpress and improving pagespeed. Love how you compared the different WP plugins and explained what actually goes into rendering a site.
Very informative and detailed work! I currently run a wordpess.com blog and hope to make the migration to .org later this year. I am honestly a little intimidated by it.
Wow! Most of this stuff was a little over my head but you explained it well. I’m going to pin this so I can reference it while optimizing my website. Thanks!
Great Article, my only concern is with InnoDB under MariaDB the “ALTER TABLE `wp_options` ADD INDEX (`autoload`);” does not work and throw an error : Table storage engine ‘InnoDB’ does not support the create option ‘TRANSACTIONAL=1’
Its oh so worth it and you’ll be much happier when it is all said and done! iWF is a great hosting company with excellent service, for hosting your WordPress site.


This article is great. I have some question in my mind. If I use Litespeed webserver and cloudlinux os then how I can optimize the server for wordpress. And after installing cloudlinux I can’t upgrade from mysql to MariaDB. Any suggession?
Very good article, my question: is it really worth using amp for the long term?
For PHP extensions you can further speed things up by removing these off the above list (they are not needed). This is when the environment is running Apache / PHP 7.4.x +PHP-FPM / Nginx (Engintron) / MariaDB.
php74-build
php74-php-dba
php74-php-gmp
php74-php-ldap
php74-php-odbc
php74-php-pgsql
php74-php-process
php74-php-pspell
php74-php-snmp
php74-php-sockets
Without the above websites still fly nicely 😉
Thank you so much for your great post on WordPress optimization. I myself recommend my friends to have a look at your optimization tricks for their wp based websites or blogs. Cheers man!
mention for webp express – great plugin – now features as part of page speed insights to serve images in modern formats
Great resources. I haven’t heard of a lot of them!
Mike,
thank you for your short book on WordPress optimization 🙂
I invite you to give ShortPixel Adaptive Images a try as well
https://wordpress.org/plugins/shortpixel-adaptive-images/
Here’s a bit about it so you can better understand what to expect:
https://blog.shortpixel.com/shortpixel-adaptive-images/
This is all such good information! I’ve been blogging for almost 10 years now, and the one thing I’ve learned is that nothing stays static, and you have to work smart to stay on top of things. I really appreciate the detailed info on WP plugins: that’s something I need to do a deep-dive into. Pinning for future reference.
This is such an in-depth piece on optimizing wordpress and improving pagespeed. Love how you compared the different WP plugins and explained what actually goes into rendering a site.
Very informative and detailed work! I currently run a wordpess.com blog and hope to make the migration to .org later this year. I am honestly a little intimidated by it.
What an informative article! You are so right about the plugins. Too many will slow down your site big time! Thanks for all the awesome tips!
Wow! Most of this stuff was a little over my head but you explained it well. I’m going to pin this so I can reference it while optimizing my website. Thanks!
Great Article, my only concern is with InnoDB under MariaDB the “ALTER TABLE `wp_options` ADD INDEX (`autoload`);” does not work and throw an error : Table storage engine ‘InnoDB’ does not support the create option ‘TRANSACTIONAL=1’
Any idea why ?
Such a great article! I’m about to switch from Blogger to Wordpress (scary!!). I cannot wait!!!
Its oh so worth it and you’ll be much happier when it is all said and done! iWF is a great hosting company with excellent service, for hosting your WordPress site.